Jicama, also known as Mexican yam bean or Mexican turnip, is a crunchy, sweet tuber prized for its refreshing taste and nutritional benefits. Low in calories, high in fiber, and rich in vitamin C and potassium, jicama is a versatile vegetable perfect for salads, snacks, and stir-fries. Unlike many root vegetables, jicama thrives in warm, sunny conditions and can produce large, delicious tubers with proper care.
For home gardeners, growing jicama might seem intimidating, but it is surprisingly beginner-friendly. With a little patience, some basic materials, and consistent care, you can cultivate big, sweet tubers in your own garden or even in large containers. This guide walks you through everything you need to know to grow jicama at home successfully.
Why Grow Jicama at Home?
- Fresh and Nutritious: Homegrown jicama is sweeter and crisper than store-bought versions.
- Space Flexibility: Can be grown in garden beds, raised beds, or large containers.
- Beginner-Friendly: Requires minimal maintenance once established.
- Sustainable: Reduces reliance on commercial produce while allowing you to recycle compost and enrich your soil.
- Unique and Rewarding: Growing jicama provides an exciting gardening challenge with a rewarding harvest.
Materials You’ll Need
- Jicama seeds or tubers
- Garden bed or large container (at least 12–15 inches deep)
- Potting soil or garden soil enriched with compost
- Watering can or hose
- Trellis or support system (optional for vining)
- Fertilizer (balanced or low-nitrogen)
- Mulch (optional)
Step 1: Choosing the Right Location
- Jicama thrives in full sun and requires at least 6–8 hours of direct sunlight per day.
- Choose a location with warm, well-draining soil. Sandy loam is ideal for tuber development.
- Ensure the area has sufficient space for vines to spread, or plan to use a trellis for vertical growth.
Step 2: Preparing the Soil
- Loosen the soil to a depth of at least 12–15 inches to accommodate tuber growth.
- Mix in well-rotted compost or organic matter to improve fertility and soil structure.
- Avoid heavy clay soils, which can impede tuber expansion and lead to deformed roots.
Step 3: Planting Jicama Seeds or Tubers
- From Seeds:
- Plant seeds 1–2 inches deep, spaced about 12–18 inches apart.
- Water gently to settle the soil.
- Keep soil moist until germination, which typically occurs within 2–3 weeks.
- From Tubers:
- Cut large tubers into sections with at least one growth bud per piece.
- Plant tuber sections 3–4 inches deep, ensuring buds face upward.
- Space tubers 12–18 inches apart to allow for optimal root development.
Step 4: Supporting Jicama Vines
- Jicama is a vining plant and can spread widely if left unsupported.
- Install a trellis, fence, or other vertical support system to train vines upward.
- This keeps the plant off the ground, reduces pest pressure, and improves air circulation.
Step 5: Watering and Moisture Management
- Keep soil consistently moist, especially during the early stages of growth.
- Avoid waterlogging, which can cause root rot and stunt tuber growth.
- Deep watering once or twice a week is preferred over frequent shallow watering.
- Mulching helps retain soil moisture and reduces weed competition.
Step 6: Fertilizing Jicama
- Use a balanced fertilizer or one slightly lower in nitrogen to encourage tuber formation rather than excessive vine growth.
- Apply fertilizer every 3–4 weeks, following package instructions.
- Organic options such as compost tea or fish emulsion are excellent for improving soil fertility and overall plant health.
Step 7: Caring for Jicama Throughout Growth
- Pruning: Trim excessive vine growth if it starts to shade lower leaves.
- Weeding: Keep the area around plants free from weeds to reduce nutrient competition.
- Pest Management: Watch for aphids, leaf miners, or caterpillars. Use neem oil or insecticidal soap for organic control.
- Temperature Management: Jicama prefers warm climates (65–85°F) and is frost-sensitive. Protect young plants if a cold snap occurs.
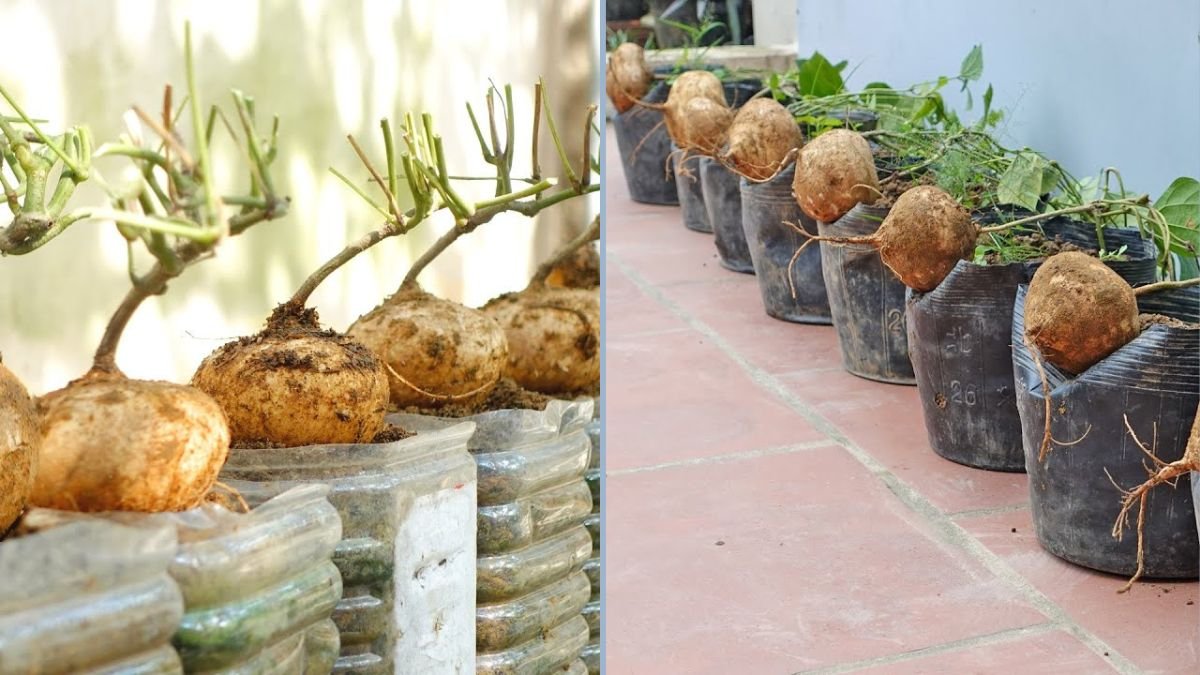
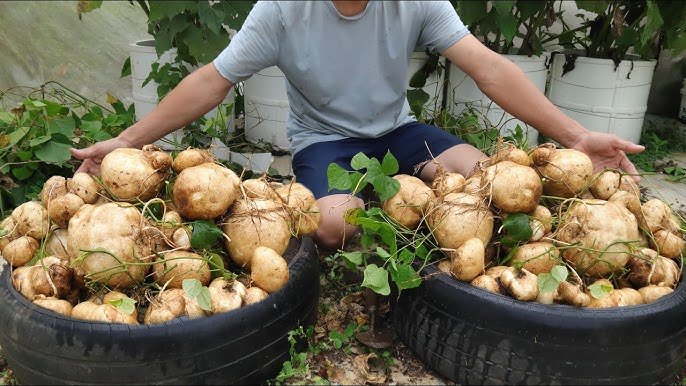
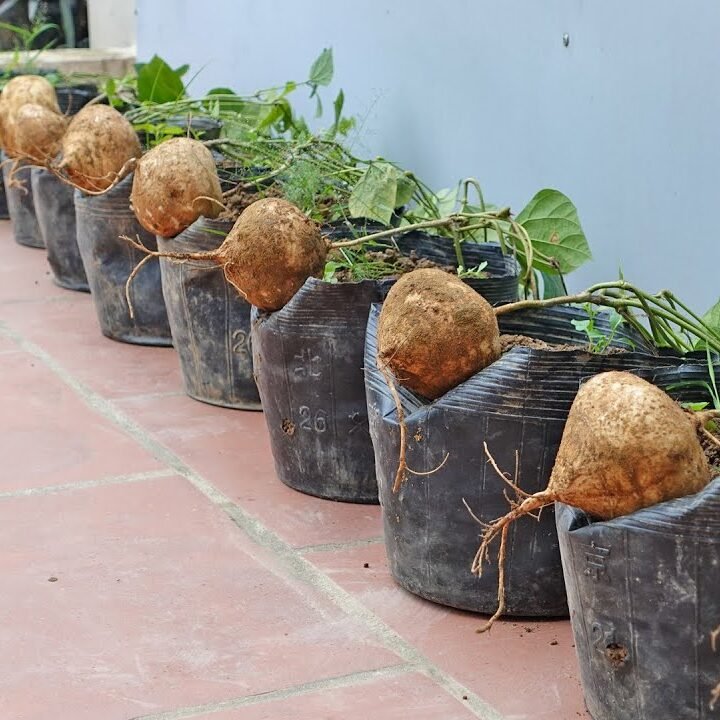
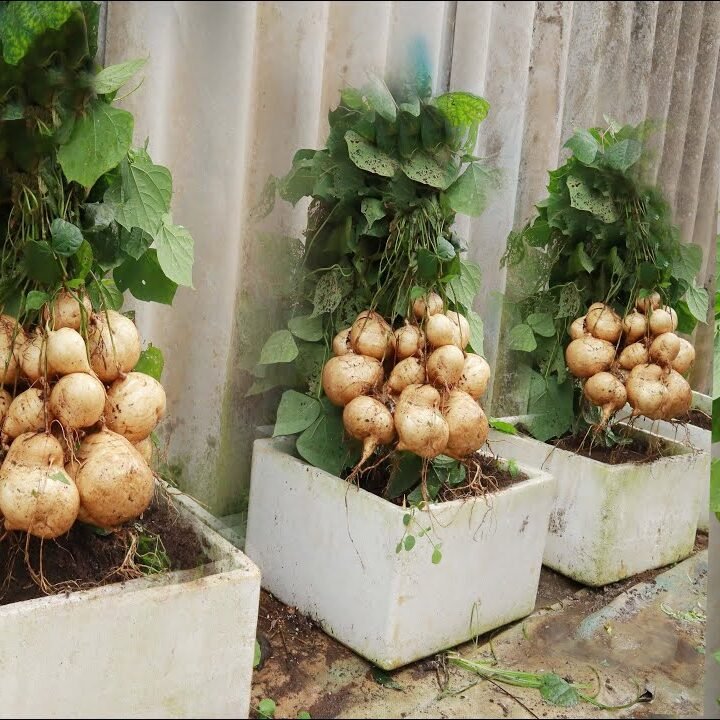
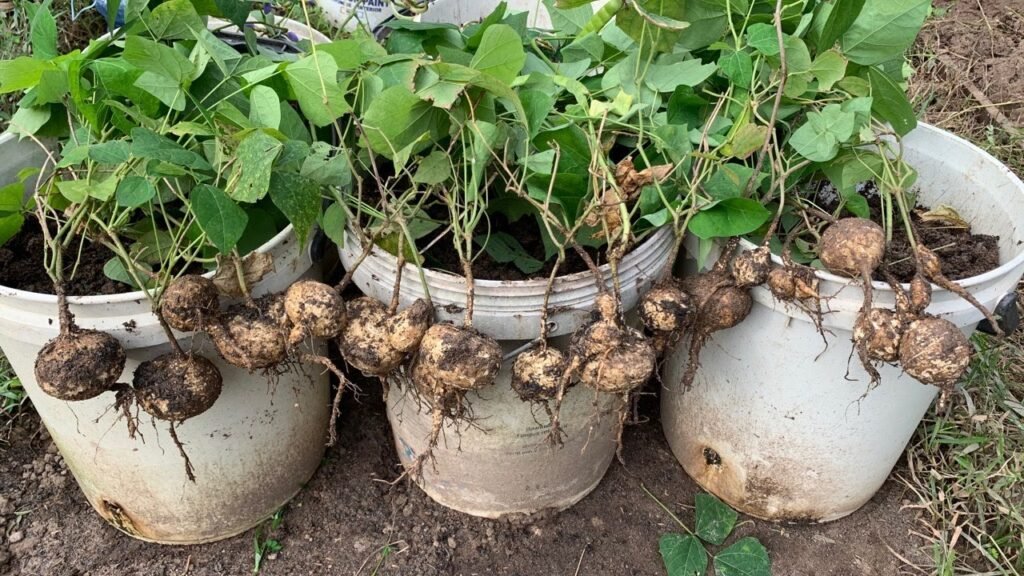
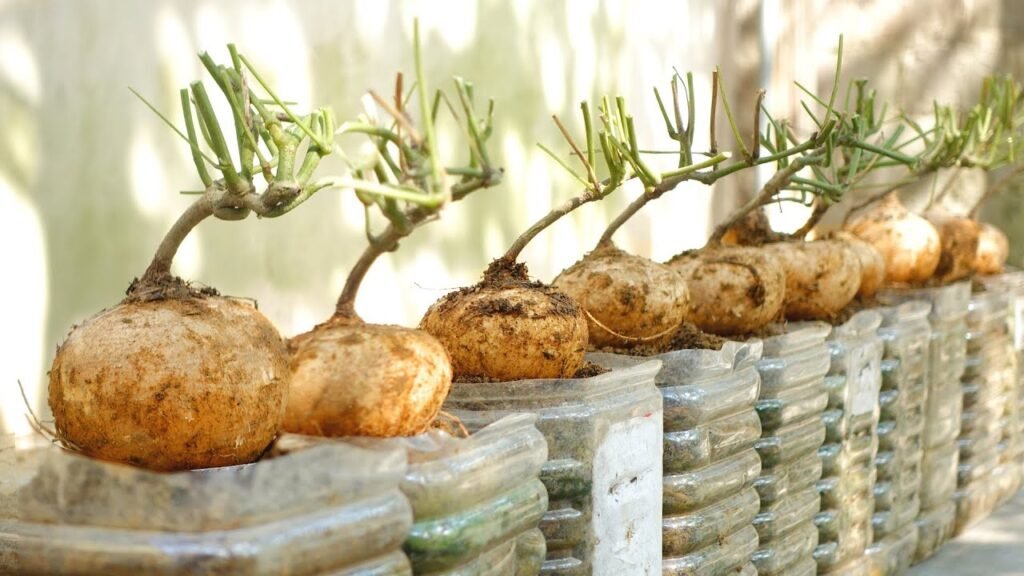
Step 8: Harvesting Jicama for Big, Sweet Tubers
- Jicama is typically ready for harvest 5–9 months after planting, depending on the variety and growing conditions.
- Gently dig around the base of the plant to lift tubers without damaging them.
- Harvest tubers when they reach 3–4 inches in diameter for optimal sweetness and texture.
- Avoid leaving jicama in the ground too long, as older tubers may become woody or fibrous.
Tips for Maximizing Tubers Size and Sweetness
- Deep, Loose Soil: Allows tubers to grow straight and large.
- Consistent Watering: Prevents stress, which can affect sweetness and size.
- Fertilizer Management: Avoid high nitrogen, which encourages leafy growth over tubers.
- Sunlight Exposure: Ensure full sun for vigorous vine and tuber development.
- Spacing: Give each plant enough room to prevent overcrowding and competition.
Benefits of Growing Jicama at Home
- Fresh, Crunchy Tubers: Homegrown jicama has superior texture and flavor compared to store-bought.
- Nutrient-Packed: Provides fiber, vitamins, and antioxidants for a healthy diet.
- Cost-Effective: Growing your own tubers saves money while ensuring quality produce.
- Beginner-Friendly: Simple planting and care make it accessible for new gardeners.
- Sustainable Gardening: Encourages composting and reduces dependence on commercial agriculture.
Common Challenges and Solutions
- Poor Tuber Growth: Often caused by compacted soil or inconsistent watering. Loosen soil and maintain regular moisture.
- Pests: Aphids and caterpillars can damage vines and leaves. Inspect regularly and treat organically.
- Temperature Sensitivity: Protect plants from frost with row covers or greenhouse setups.
- Deformed Tubers: Can occur from overcrowding or rocky soil; ensure proper spacing and smooth soil conditions.
- Slow Germination: Seeds may take up to 3 weeks to sprout. Keep soil moist and warm.
Tips for Year-Round Jicama Gardening
- Container Growing: Large pots or raised beds allow jicama cultivation even in small spaces.
- Succession Planting: Plant new seeds or tubers every few weeks in warmer climates for continuous harvest.
- Indoor Seed Starting: Start seeds indoors 4–6 weeks before transplanting to extend the growing season.
- Companion Planting: Grow jicama alongside beans, corn, or other climbing plants for natural support and improved growth conditions.
Conclusion
Growing jicama at home is an achievable goal, even for beginners. With proper soil preparation, consistent care, and patience, you can harvest big, sweet tubers perfect for fresh salads, snacks, and cooking. The process of planting seeds or tubers, supporting vining growth, watering regularly, and managing fertilizer ensures healthy plants and productive harvests.
By following these steps—from planting to harvesting—you can enjoy the satisfaction of growing your own jicama and reap the benefits of fresh, nutritious, and delicious tubers all year round. Start your jicama garden today, and discover how easy and rewarding it is to grow this versatile root vegetable at home.