If you live in a city apartment, have a small terrace, or simply want to make the most of limited space, growing beets in containers is one of the most rewarding and practical gardening projects you can try. With the right container, good soil, and consistent care, you can easily grow fresh, vibrant beets right at home — from seed to harvest.
This guide will take you through everything you need to know about container-grown beets: the setup, planting process, care tips, and when and how to harvest your delicious roots.
Why Grow Beets in Containers?

Growing beets in containers is ideal for urban gardeners, beginners, or anyone looking for a simple, space-saving way to enjoy homegrown produce. Here’s why this method works so well:
- Space-efficient: You don’t need a big backyard or raised bed. Containers can fit on a balcony, rooftop, or even a sunny windowsill.
- Control over soil and moisture: Container gardening allows you to adjust soil type, texture, and drainage — giving your plants the perfect environment.
- Dual harvest: Beets give you both edible roots and greens. The leaves are tender and nutritious, adding extra value to your harvest.
- Cleaner and low-maintenance: Containers reduce weed growth and pest problems.
- Sustainable and flexible: You can move containers around for optimal sunlight or protect them during harsh weather.
What You’ll Need
Before you begin, gather these simple materials:
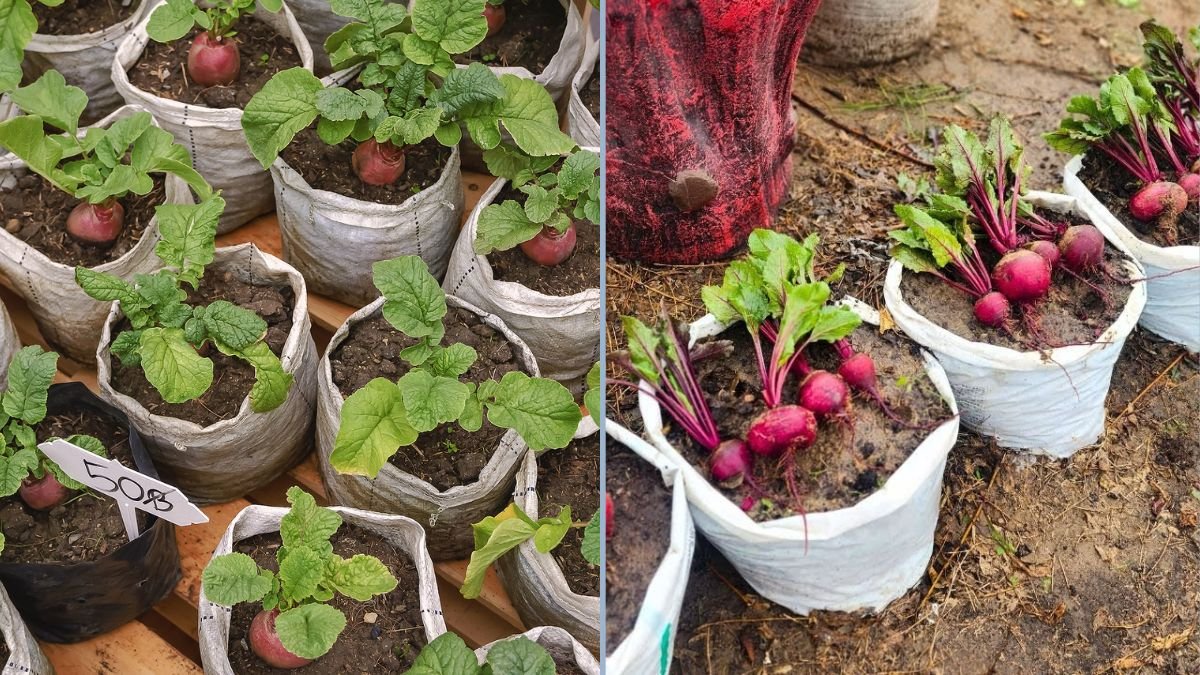
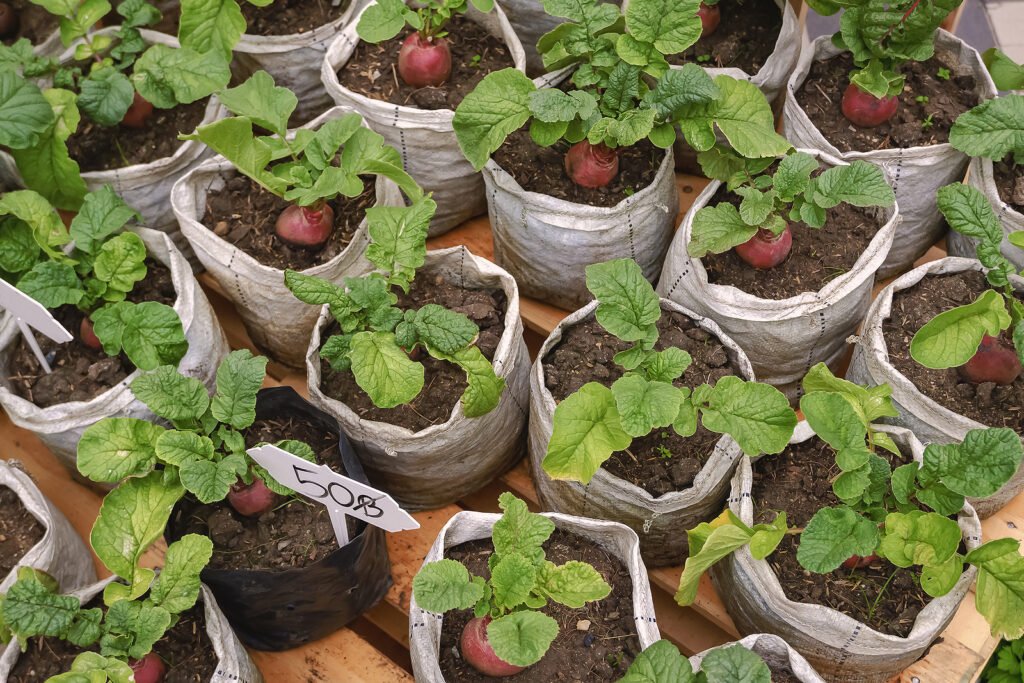
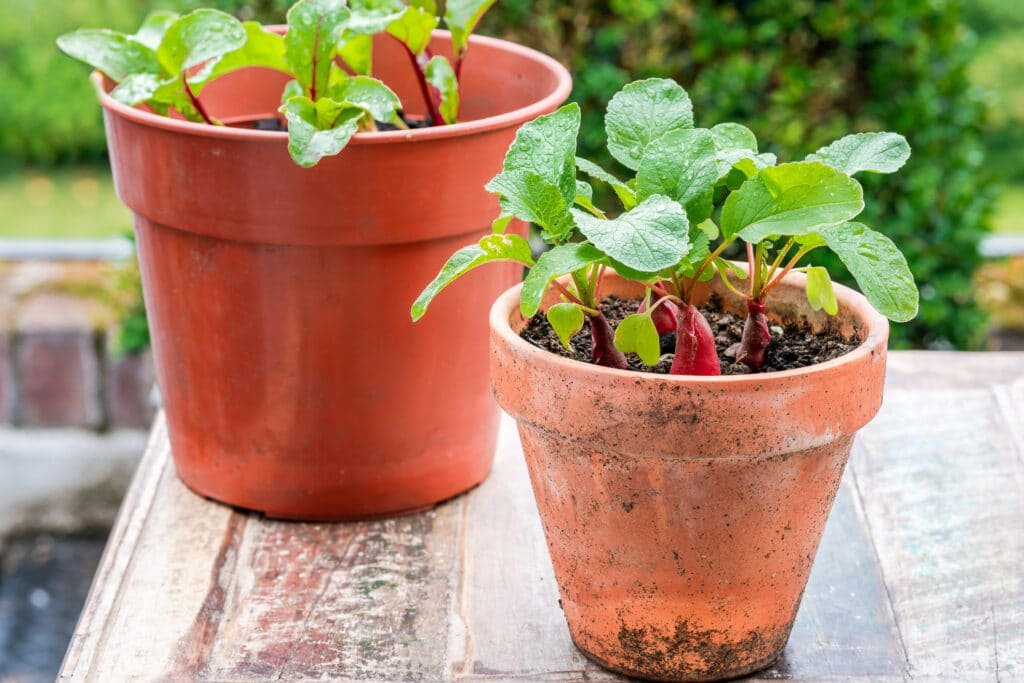
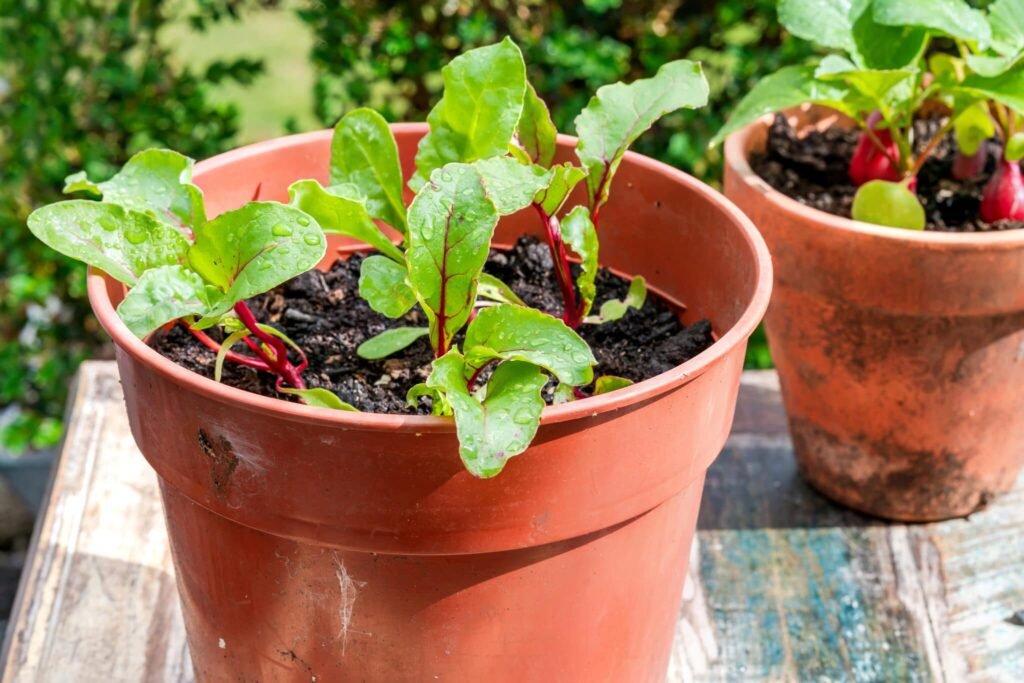
- Container: Choose a pot or container at least 10–12 inches deep. This gives beet roots enough room to expand. Ensure it has drainage holes.
- Soil mix: Use a loose, well-draining mix made of garden soil, compost, and coarse sand or perlite. Beets thrive in light, fertile soil that’s easy for roots to penetrate.
- Beet seeds: Opt for small or round varieties such as Detroit Dark Red, Chioggia, or Touchstone Gold.
- Watering can or spray bottle: For gentle watering without disturbing the soil.
- Sunny location: A spot that receives 4–6 hours of sunlight per day.
- Optional: Organic fertilizer, mulch, or coconut coir to help retain soil moisture.
Step-by-Step: How to Grow Beets in Containers
1. Prepare the Container
Select a sturdy container about 10–12 inches deep and at least 12 inches wide. It can be plastic, clay, fabric, or even a recycled bucket — just make sure it has good drainage holes.
If you live in a hot area, avoid black plastic pots as they absorb too much heat and can dry out the soil quickly. Instead, use light-colored containers or wrap them with a reflective material to keep roots cool.
2. Make the Soil Mix
Beets prefer slightly sandy, fertile soil that drains well. A good mix is:
- 50% garden or potting soil
- 30% organic compost or well-rotted manure
- 20% sand, cocopeat, or perlite
This blend ensures proper drainage and root development. Mix thoroughly and fill your container, leaving about 2 inches of space at the top for watering.
3. Sow the Seeds
Beet “seeds” are actually clusters containing multiple seeds. Plant them about half an inch (1–1.5 cm) deep and 1–2 inches apart in rows or circles within the container.
After sowing, gently cover them with soil and water lightly. Keep the soil consistently moist until germination, which usually takes 5–10 days.
4. Light and Placement
Place your container where it gets at least 4–6 hours of direct sunlight each day. Morning sun with a bit of afternoon shade is perfect, especially in warmer regions.
If the temperature is too high, move the container to a slightly shaded spot or use a shade net to protect the plants. Beets prefer cool to moderate conditions for best root growth.
5. Watering and Moisture
Water regularly to keep the soil moist but not soggy. Container soil dries out faster than ground soil, so daily checks are important, especially during warm weather.
A simple test: Stick your finger an inch into the soil — if it feels dry, it’s time to water. Avoid waterlogging, as soggy soil can cause root rot.
6. Thinning the Seedlings
Once the seedlings grow about 2 inches tall, you’ll notice clusters of plants coming from one seed cluster. Thin them out so that each plant has at least 3–4 inches of space to grow.
You can gently pull out the extras and replant them in another pot or use them as tender microgreens in salads. Thinning ensures proper root development and prevents overcrowding.
Caring for Beets as They Grow
Fertilizing
Beets don’t need heavy feeding, but they appreciate a nutrient boost once or twice during growth. Use an organic, balanced fertilizer or add compost tea every 2–3 weeks.
Avoid nitrogen-rich fertilizers (like urea) as they encourage leafy growth at the expense of roots. Instead, look for balanced or phosphorus-rich fertilizers that support root formation.
Mulching
Add a thin layer of mulch (like dried leaves, straw, or cocopeat) on top of the soil. This helps retain moisture, regulate temperature, and reduce weeds.
Temperature and Airflow
Beets grow best in cool to moderate climates. Ideal temperature: 15–25°C (59–77°F). If it’s too hot, roots can become tough, and plants may bolt (flower early). Good airflow around the container helps prevent fungal diseases.
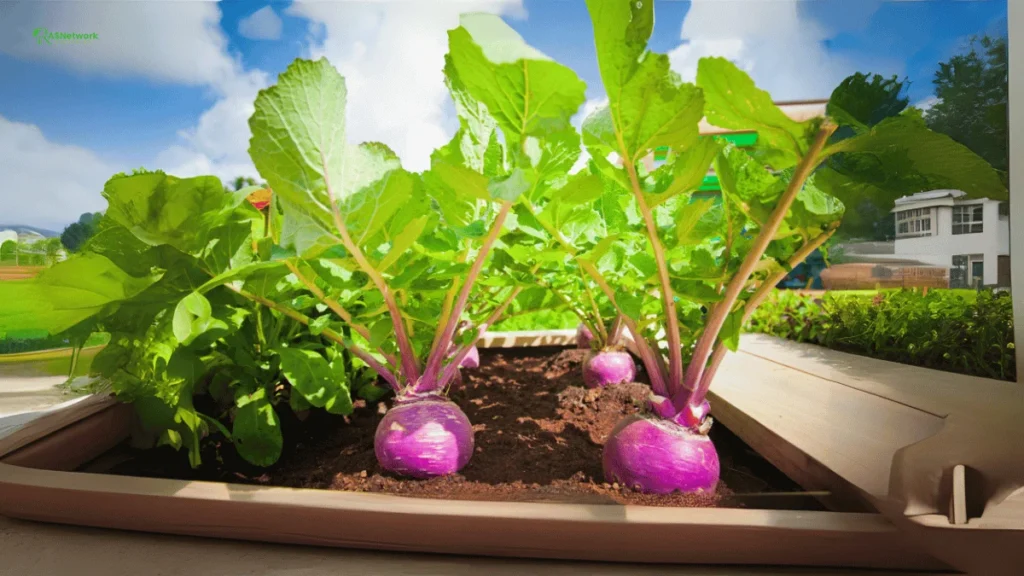
From Seedling to Harvest
Beets are relatively quick-growing — depending on the variety, they’re usually ready to harvest in 45 to 70 days.
Here’s how to know when your beets are ready:
- The tops of the roots (called “shoulders”) begin to push out of the soil and become visible.
- The roots feel firm and round, usually 1.5 to 3 inches in diameter.
- Leaves are lush and healthy-looking.
To harvest, loosen the soil around the plant and gently pull up the beet by holding the base of the leaves. Avoid tugging too hard — it’s better to loosen the soil with a trowel first.
For baby beets, you can harvest earlier, around 35–40 days, when the roots are small and tender.
Using Every Part of the Plant
Don’t throw away the leaves! Beet greens are edible and delicious. Young leaves are tender and can be eaten raw in salads, while mature ones can be sautéed or added to soups.
The roots themselves can be roasted, boiled, or pickled. Freshly harvested beets are sweeter and juicier than store-bought ones — and growing them yourself adds that extra satisfaction.
Common Problems and Solutions
1. Small or misshapen roots:
Usually caused by overcrowding or compact soil. Thin the seedlings and make sure the soil is loose and well-draining.
2. Lots of leaves but tiny beets:
This happens when the soil is too rich in nitrogen. Use a balanced fertilizer and avoid overfeeding.
3. Cracked or tough roots:
Irregular watering or leaving beets in the container too long can cause this. Keep moisture consistent and harvest on time.
4. Wilting or yellowing leaves:
May indicate poor drainage or overwatering. Check if water is pooling at the bottom and adjust accordingly.
5. Bolting (flowering early):
This is common in hot weather. Move your container to a cooler spot or plant during cooler months.
Best Beet Varieties for Containers
Some beet varieties perform better in containers due to their smaller size or faster maturity. Try:
- Detroit Dark Red: Classic red beet, round and flavorful.
- Chioggia: Beautiful pink-and-white rings inside, sweet and mild.
- Touchstone Gold: Golden roots with a mild, earthy flavor.
- Babybeat: Compact and perfect for smaller pots.
Seasonal Tips for Indian Conditions
If you’re gardening in India (especially in regions like Maharashtra):
- Plant beets during the cooler months — October to February is ideal.
- In hot weather, give light shade during the afternoon to prevent stress.
- Use terracotta or fabric pots to help the soil stay cooler.
- Water in the early morning or evening to reduce evaporation.
Final Thoughts
Beets are one of the easiest and most rewarding vegetables to grow in containers. They’re low-maintenance, quick to harvest, and offer the bonus of edible greens. With just a few recycled pots, good soil, and regular watering, you can enjoy vibrant, homegrown beets right on your balcony or terrace.
The best part? You’ll be transforming a small space into a thriving garden while growing food that’s fresh, healthy, and organic.
So grab a pot, some soil, and a handful of beet seeds — and start your journey from seed to harvest today. Within a few weeks, you’ll be pulling up your very own beets, grown with love and a touch of creativity.