Growing your own vegetables is one of the most rewarding hobbies you can take up, and potting squash plants — especially butternut squash — is a perfect place to start. Whether you’re working with limited garden space, a sunny balcony, or a small backyard, learning how to properly pot and care for squash plants allows you to enjoy an abundant harvest right from your home.
This guide will walk you through everything you need to know about potting butternut squash, from choosing containers and preparing the right soil mix to watering, fertilizing, and harvesting. Let’s dig in!
Why Grow Butternut Squash in Pots?
Butternut squash is a warm-season vegetable prized for its sweet, nutty flavor and versatility in soups, roasts, and purees. While traditionally grown in large garden beds, potting butternut squash is becoming increasingly popular for a few reasons:
- Space Efficiency – Potted squash can thrive on patios, balconies, or decks where garden beds aren’t available.
- Mobility – Containers can be moved to catch sunlight or sheltered from extreme weather.
- Pest Control – Growing in pots helps reduce soil-borne pests and diseases.
- Controlled Soil Quality – You can create an ideal soil mix rich in nutrients for optimal growth.
- Easier Maintenance – Pruning, watering, and harvesting are simpler when plants are elevated in containers.
Choosing the Right Container
The success of your squash plants begins with choosing the right pot size and material.
Ideal Pot Size
- Minimum size: 5 gallons (19 liters) per plant.
- Preferred size: 10–15 gallons (38–57 liters) for vigorous growth and larger harvests.
- Depth: At least 12–18 inches to allow proper root expansion.
Pot Materials
- Plastic or Resin Pots: Lightweight and retain moisture better in hot weather.
- Fabric Grow Bags: Excellent drainage and aeration, ideal for hot climates.
- Clay or Terracotta Pots: Natural look but may dry out faster; ideal for cooler climates.
Make sure your container has drainage holes to prevent waterlogging — one of the biggest causes of root rot in container gardening.
Preparing the Perfect Soil Mix
Squash plants need rich, well-draining soil packed with nutrients. Standard garden soil is too dense for containers, so it’s best to create a light and fertile mix.
Recommended Soil Mix
Combine:
- 40% compost (nutrient source)
- 30% coco peat or peat moss (for moisture retention)
- 20% garden soil or loam (for structure)
- 10% perlite or sand (for drainage and aeration)
Before potting, mix in a slow-release organic fertilizer or well-rotted manure. This will supply a steady stream of nutrients during the early growth stages.
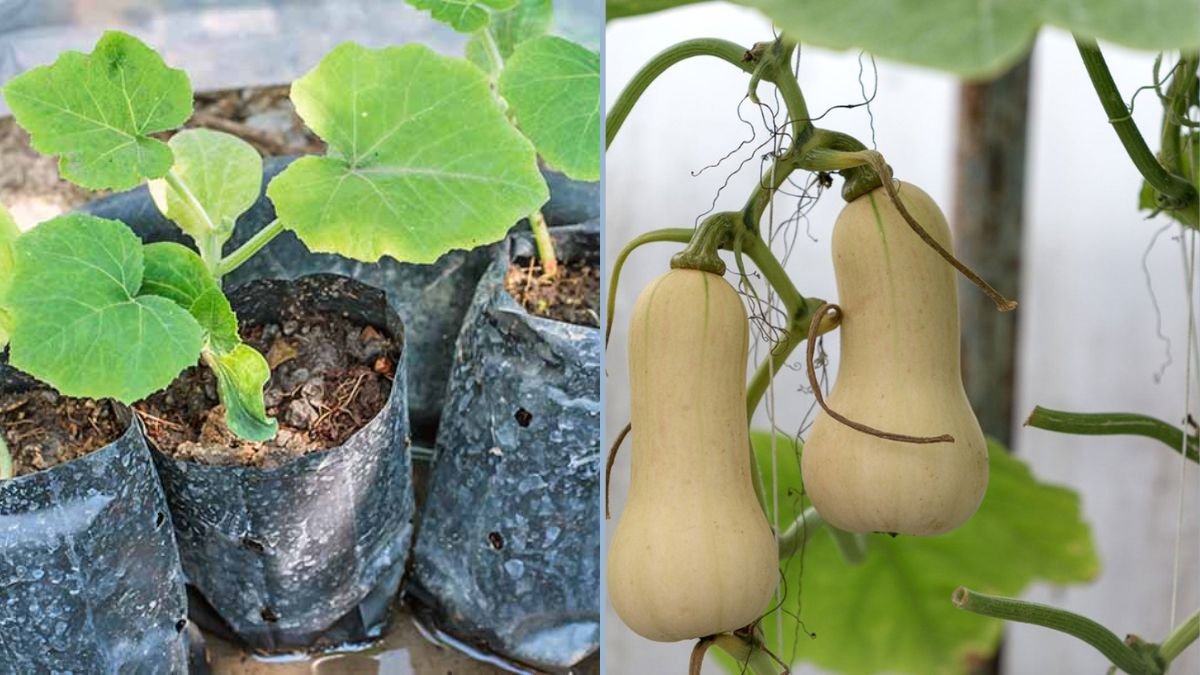
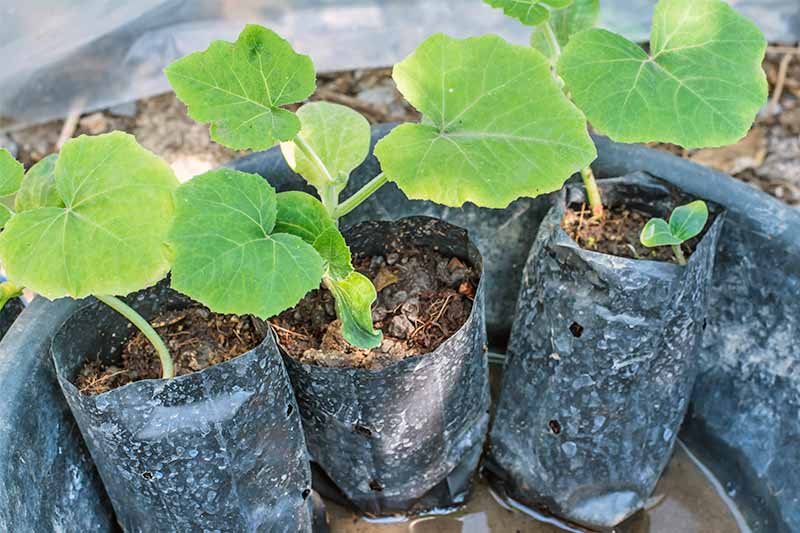
Potting Up Your Butternut Squash
Once your container and soil mix are ready, it’s time to pot your squash plants. You can start from seeds or transplant seedlings.
Step 1: Select Healthy Seedlings or Seeds
If starting from seed:
- Sow 2–3 seeds in small pots or trays, about 1 inch deep.
- Keep soil moist and warm (around 70–80°F or 21–27°C).
- Seeds typically germinate in 5–10 days.
Once seedlings have 2–3 true leaves, they’re ready to transplant. Choose the strongest plant from each group.
Step 2: Prepare the Pot
- Fill your container with the prepared soil mix, leaving 2–3 inches from the rim.
- Water lightly before planting to settle the soil.
Step 3: Planting the Seedling
- Create a small hole in the center, deep enough to accommodate the root ball.
- Gently place the seedling in the hole, backfill with soil, and firm it gently.
- Water thoroughly to help the roots settle.
If you’re planting multiple squash plants, space them 3–4 feet apart to allow vines to spread freely.
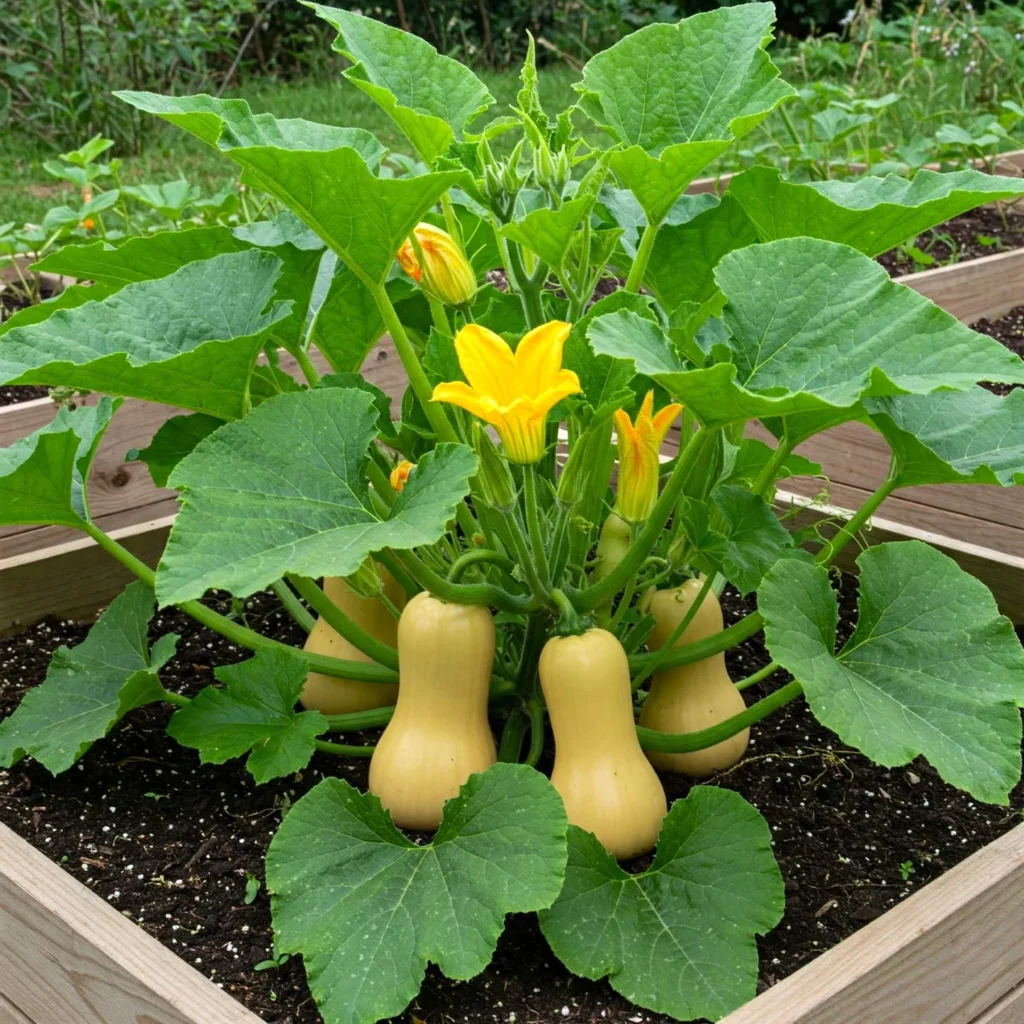
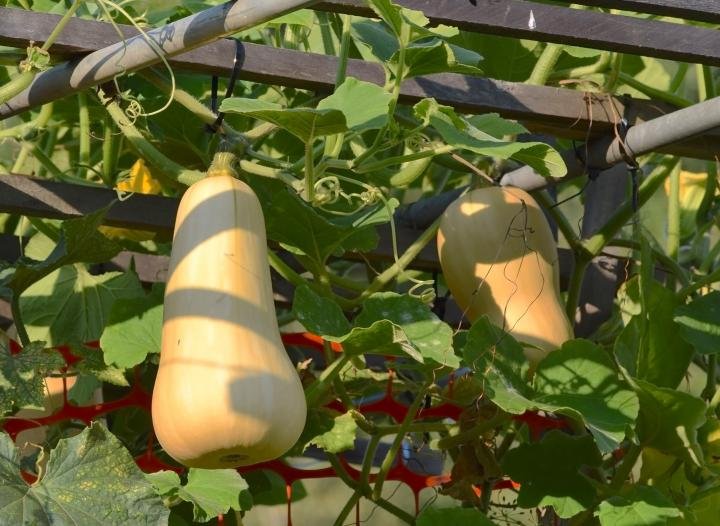
Providing Proper Support
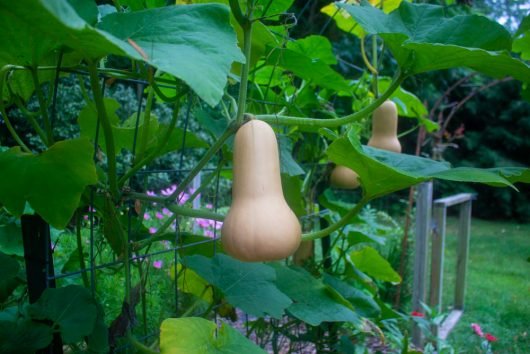
Butternut squash plants can produce long, sprawling vines, which may take up significant space. To keep your potted garden organized, consider providing vertical support.
Trellising Tips
- Place a sturdy tomato cage, bamboo teepee, or metal trellis inside the pot.
- Train vines upward as they grow by gently tying them with soft garden twine.
- Vertical growth improves air circulation and prevents fruit from sitting on damp soil, reducing rot.
Watering and Feeding
Water management is one of the most crucial aspects of growing squash in pots.
Watering Guidelines
- Keep soil consistently moist but never soggy.
- Water deeply 2–3 times a week, allowing moisture to reach the roots.
- During hot weather, you may need to water daily.
- Always water at the base of the plant, avoiding leaves to prevent fungal issues.
Feeding Schedule
- Feed with a balanced organic liquid fertilizer (such as compost tea or seaweed extract) every 2–3 weeks during the growing season.
- Once flowers begin forming, switch to a fertilizer higher in phosphorus and potassium to encourage fruiting.
Managing Sunlight and Temperature
Butternut squash loves warmth and sunshine.
- Place pots in a location that receives 6–8 hours of direct sunlight daily.
- If temperatures exceed 95°F (35°C), provide light shade using a garden cloth to prevent leaf scorch.
- During cooler nights, you can move containers closer to a wall or indoors for added warmth.
Pollination: Helping Nature Along
Squash plants produce male and female flowers, and both are needed for fruit development. In open gardens, bees and insects handle pollination, but in container gardens or indoor setups, you may need to assist manually.
How to Hand-Pollinate
- Identify male flowers (on long stems) and female flowers (with a small bulb-like fruit beneath).
- Use a soft brush or cotton swab to transfer pollen from the male flower to the center of the female flower.
- Repeat the process for multiple blooms to ensure fruit set.
Within a week, successful pollination will result in visible fruit growth beneath the flower.
Pruning and Maintenance
Healthy pruning keeps plants manageable and productive:
- Remove yellowing or diseased leaves to improve airflow.
- Trim excessive side vines to direct the plant’s energy toward fruit development.
- Keep an eye out for aphids, squash bugs, and powdery mildew — common issues that can be managed organically with neem oil or soapy water sprays.
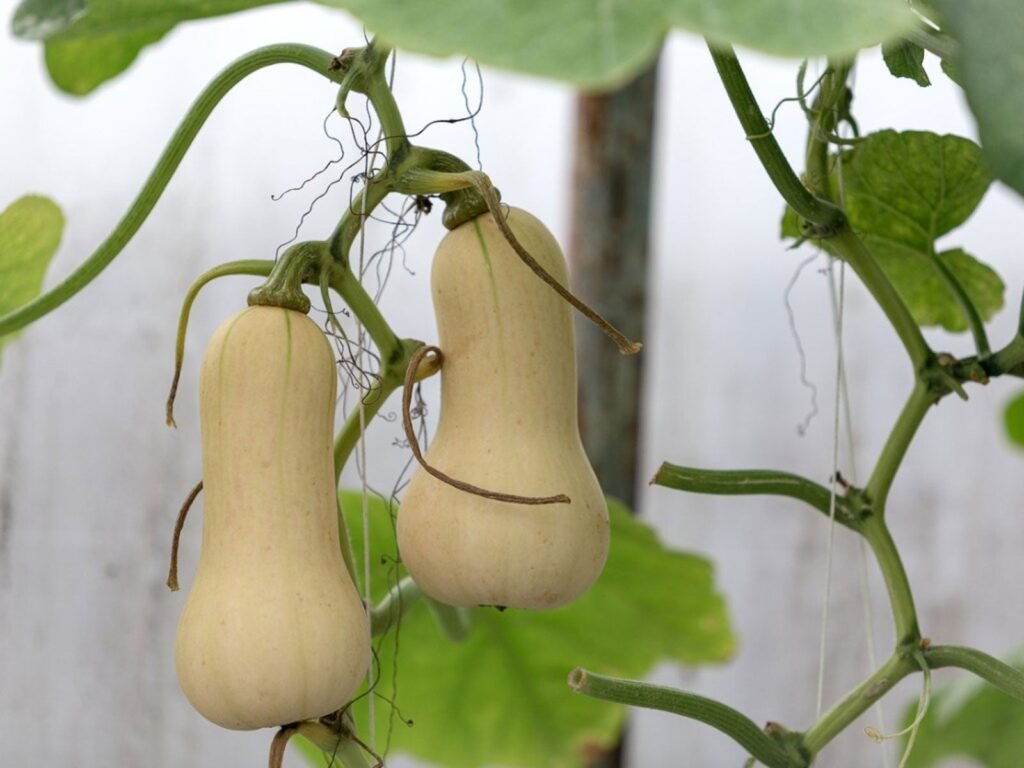
Harvesting Butternut Squash
Your patience pays off when your pots begin to produce beautiful, tan-colored squash!
Signs Your Butternut Squash Is Ready
- The skin changes from green to a uniform beige-tan color.
- The rind becomes hard and tough (you shouldn’t be able to pierce it easily with a fingernail).
- The stem begins to dry and turn brown.
Harvesting Tips
- Cut the squash from the vine with pruning shears, leaving at least 1 inch of stem attached.
- Handle fruits carefully to avoid bruising.
- Cure harvested squash in a warm, dry area for 10–14 days to harden the skin and improve storage life.
Properly cured butternut squash can last for 2–3 months in a cool, dry place — perfect for soups, curries, and roasting all winter long.
Common Mistakes to Avoid
Even experienced gardeners can make a few errors when growing squash in containers. Avoid these common pitfalls:
- Overcrowding Pots – Squash needs space; overcrowding limits root development and yield.
- Overwatering – Consistent sogginess leads to root rot. Check soil moisture before watering.
- Poor Drainage – Always ensure pots have adequate drainage holes.
- Ignoring Pollination – Without pollination, you’ll see flowers but no fruit.
- Lack of Support – Vines without structure can break or rot easily.
Final Thoughts: A Rewarding Way to Garden
Potting squash, especially butternut squash, is a fulfilling and practical way to enjoy fresh, homegrown vegetables — even in small spaces. With the right container, nutrient-rich soil, consistent watering, and proper care, you can expect vigorous plants that produce flavorful, nutrient-packed fruits throughout the season.
Whether you’re a seasoned gardener or a complete beginner, growing butternut squash in pots connects you to the rhythm of nature and the joy of sustainable living. Once you harvest your first ripe squash, you’ll understand why so many gardeners fall in love with container gardening — it’s simple, productive, and incredibly rewarding.