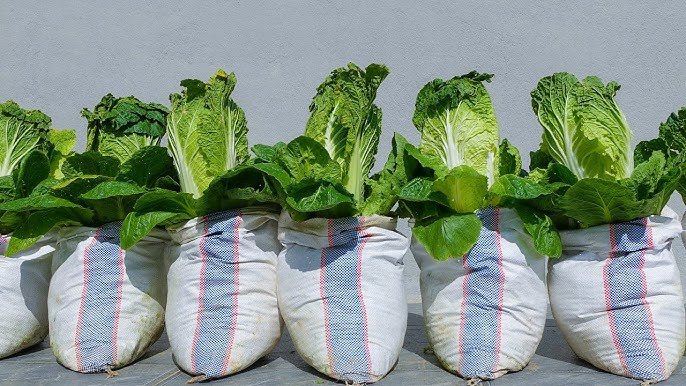
![[No Garden? No Problem!] How to Grow Napa Cabbage at Home Using Recycled Plastic Containers](https://maheshlunchhome.org/wp-content/uploads/2025/10/Big-Bucks-for-Change-One-Bicentennial-Quarter-Could-Fetch-5.7M—Plus-4-Coins-Worth-30M-2025-10-30T125415.935.jpg)
Do you dream of harvesting fresh, crisp napa cabbage right from your home but don’t have a garden? You’re not alone. Urban living often limits outdoor space, yet the desire to grow your own vegetables is stronger than ever. Luckily, you can turn this challenge into a creative opportunity — and all you need are recycled plastic containers, a little soil, and a bit of care.
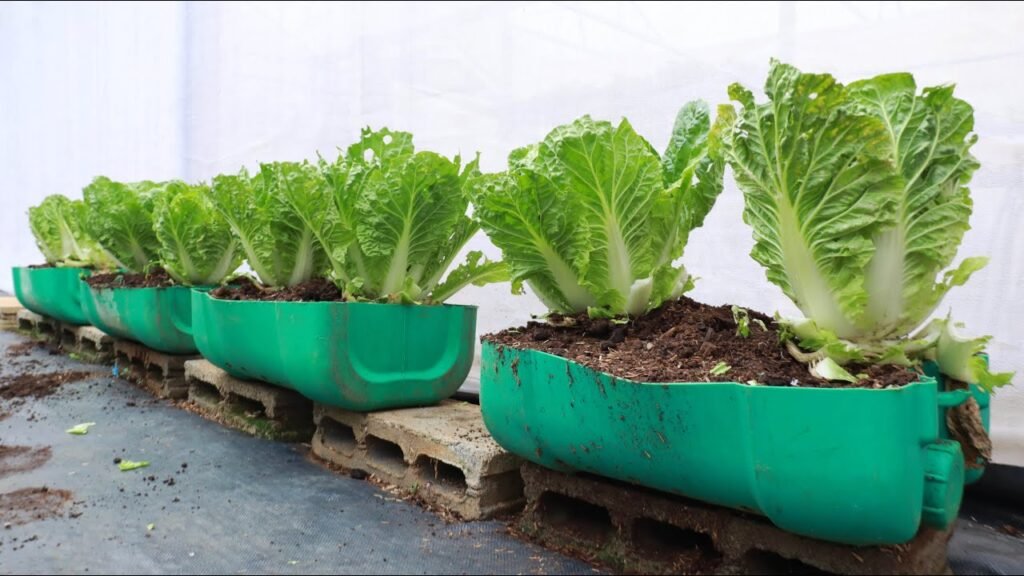
In this post, we’ll explore how you can grow napa cabbage (also known as Chinese cabbage) at home using mass recycled plastic containers. Whether you live in an apartment, a small house without a yard, or just want to repurpose waste materials, this guide will walk you through everything from setup to harvest.
Why Napa Cabbage?
Napa cabbage is one of the most versatile leafy vegetables you can grow. Popular in Asian cuisines, it’s used in everything from kimchi and stir-fries to soups and fresh salads. It’s a cool-weather crop that grows best in mild temperatures, and it can thrive indoors or on balconies if given the right conditions.
Benefits of growing napa cabbage at home:
- Fast growth: You can harvest baby leaves in as little as 30 days, or mature heads in about 70–90 days.
- Nutrient-rich: Packed with vitamins A, C, and K, as well as calcium and antioxidants.
- Low maintenance: It doesn’t require constant attention or complex fertilizers.
- Eco-friendly potential: You can grow it in containers made from recycled plastic, reducing household waste.
Turning Trash into Treasure: Why Use Recycled Plastic Containers?
In an age of increasing plastic waste, finding practical ways to reuse materials is essential. By using recycled plastic containers, you’re giving new life to materials that might otherwise end up in landfills or oceans.
Here’s why they’re ideal for home gardening:
- Abundance: Plastic containers are everywhere — old storage bins, bottles, buckets, or even large milk jugs.
- Durability: Unlike biodegradable pots, plastic doesn’t easily break down in moisture or sunlight.
- Lightweight and portable: Perfect for apartment dwellers who need to move plants indoors or onto balconies.
- Customizable: You can cut, paint, or drill holes to suit your plant’s needs.
Pro tip: Choose food-grade plastics if possible (marked with recycling codes 1, 2, 4, or 5). Avoid containers that previously held chemicals or toxic substances.
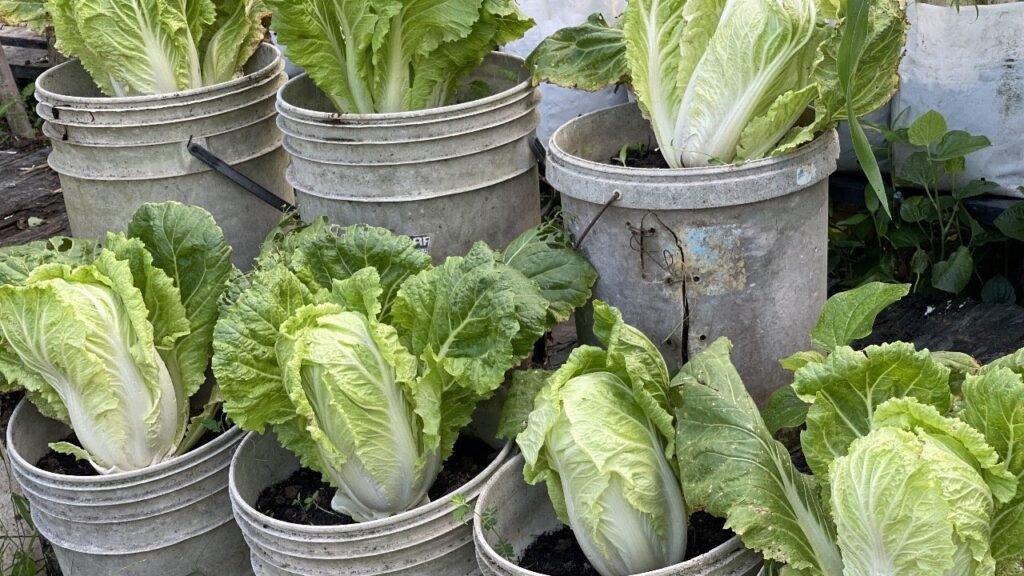
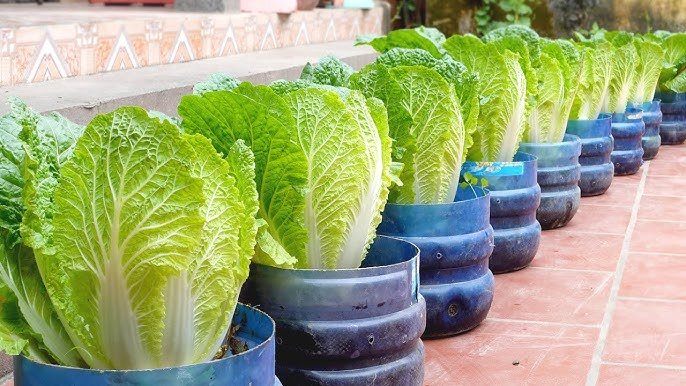
Step-by-Step Guide: Growing Napa Cabbage in Recycled Plastic Containers
1. Choose the Right Container
Napa cabbage needs space for its roots to grow deep and wide. Ideally, each plant should have at least 12–14 inches of depth and about 10 inches of width.
Suitable options include:
- Old plastic buckets
- Large water bottles (cut in half)
- Storage bins
- Paint pails (cleaned thoroughly)
Drill 4–6 drainage holes at the bottom to prevent waterlogging. Elevate the container slightly with bricks or a tray to allow excess water to drain.
2. Prepare the Soil Mix
Good soil equals healthy plants. Napa cabbage thrives in loose, fertile, and well-drained soil.
DIY soil mix recipe:
- 50% garden soil or compost
- 30% coco peat or peat moss (for moisture retention)
- 20% perlite or sand (for drainage)
Add a handful of organic fertilizer such as composted manure or kitchen compost. Napa cabbage prefers soil with a pH between 6.0 and 7.5.
3. Planting the Seeds
You can start from seeds or seedlings. Seeds are inexpensive and easy to find online or at gardening stores.
To sow seeds:
- Plant them about ¼ inch deep in the soil.
- Space them at least 10 inches apart if you’re using a large container.
- Lightly water after sowing.
If you want to be more efficient, start seeds in smaller containers (like yogurt cups or egg cartons) and transplant them once they have 3–4 true leaves.
4. Provide Light and Temperature
Napa cabbage loves cool weather and indirect sunlight.
- Light: Place your containers near a sunny window or balcony that gets 4–6 hours of sunlight daily.
- Temperature: Ideal growing range is 10–22°C (50–72°F). Avoid extreme heat — if it gets too hot, move the plants indoors or provide shade.
If you live in a warmer climate, growing napa cabbage in early spring or fall is ideal. Indoors, you can use LED grow lights to supplement natural light.
5. Watering and Care
Napa cabbage needs consistent moisture to grow tender and juicy leaves — but avoid overwatering.
Watering tips:
- Keep soil evenly moist but not soggy.
- Water early in the morning or late afternoon.
- Mulch the top of the soil with dried leaves or straw to retain moisture and keep weeds away.
Fertilize every 2–3 weeks with a diluted organic fertilizer or compost tea to keep the plants healthy and productive.
6. Pest Control (Naturally!)
Common pests include aphids, slugs, and cabbage worms. Since you’re growing indoors or on a balcony, pest problems are less likely, but they can still appear.
Natural remedies:
- Spray with neem oil solution (1 teaspoon neem oil + a few drops of dish soap in 1 liter of water).
- Sprinkle diatomaceous earth around the base of the plants.
- Introduce companion plants like garlic or mint nearby to deter pests.
Avoid harsh chemical pesticides, especially when growing food at home.
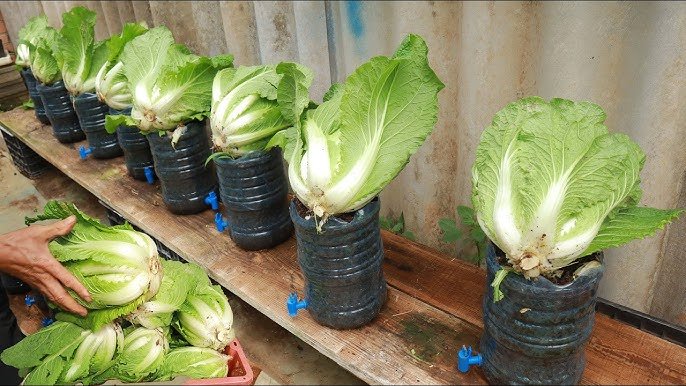
7. Harvesting
Your napa cabbage will be ready to harvest in 70–90 days when the heads are firm and full-sized.
To harvest:
- Cut the head at the base with a clean knife, leaving the outer leaves intact.
- You can also harvest outer leaves gradually if you prefer continuous harvesting.
If you leave the roots in the soil and keep watering, new leaves might sprout — a great way to extend your harvest.
Bonus Tip: Regrow Napa Cabbage from Kitchen Scraps
Don’t throw away your kitchen scraps! You can regrow napa cabbage from the base of a store-bought head.
Here’s how:
- Cut off the bottom 2–3 inches of the cabbage base.
- Place it in a shallow bowl with about an inch of water.
- Keep it near sunlight and change the water every 2 days.
- In about a week, new leaves and roots will appear.
- Transfer it to your recycled plastic container with soil, and watch it grow!
This method is simple, fun, and great for kids or beginners who want to see results quickly.
Sustainable Gardening: Growing Food and Reducing Waste
Using recycled plastic containers isn’t just convenient — it’s a small but powerful act of sustainability. By reusing materials, you help:
- Reduce plastic waste in your community.
- Lower your carbon footprint by growing local food.
- Encourage circular living — turning waste into value.
Pair this with composting your kitchen scraps, and you’ll have a nearly zero-waste system that benefits both your health and the environment.
Final Thoughts: A Greener Future Starts at Home
Growing napa cabbage in recycled plastic containers proves that you don’t need a large backyard or fancy equipment to start gardening. With creativity and care, anyone — from city apartment dwellers to suburban homeowners — can enjoy the rewards of homegrown produce.
This method not only helps you eat fresh and healthy but also reduces plastic waste, making it a win for both you and the planet. So the next time you’re about to throw away that old plastic bucket or bottle, think again — it might just become the next home for your delicious napa cabbage garden.
Start today! Gather a few containers, pick up some seeds, and transform your balcony, kitchen window, or rooftop into a green space full of life and flavor.