Celery is a versatile, nutrient-packed vegetable that’s perfect for salads, soups, stir-fries, and smoothies. It’s low in calories, rich in vitamins and minerals, and has a refreshing crunch that makes any dish better. Despite its benefits, many people struggle to keep store-bought celery fresh or end up spending a lot on organic options. Fortunately, growing celery at home is easier than you might think—and it doesn’t require a big garden. With just a few small plastic bottles, you can cultivate vibrant, healthy celery year-round, right in your kitchen or balcony.
In this post, we’ll show you how to grow celery at home using plastic bottles, step by step. This method is budget-friendly, space-saving, and perfect for beginners.
Why Grow Celery at Home
Growing celery at home offers several advantages:
- Freshness: You’ll always have crisp, flavorful celery on hand.
- Cost savings: Store-bought celery can be expensive and often has a short shelf life.
- Sustainability: Reusing plastic bottles for gardening reduces waste.
- Convenience: Grow celery in small spaces—perfect for apartments or terraces.
- Control: You can avoid pesticides and harmful chemicals by growing organically.
With just a few bottles and a bit of water, you can enjoy celery that’s fresher and healthier than anything from the store.
Materials You’ll Need
This method is simple and requires only a few basic items:
- Plastic bottles: Small bottles (500ml to 1L) with caps removed.
- Celery stalks: Use store-bought celery, focusing on the base where the roots were.
- Water: Tap water works fine; filtered water is ideal.
- Optional soil or sand: For faster root development, though celery can grow in just water.
- Scissors or knife: For trimming celery and preparing bottles.
This approach is incredibly cost-effective and accessible, making it perfect for urban gardening.
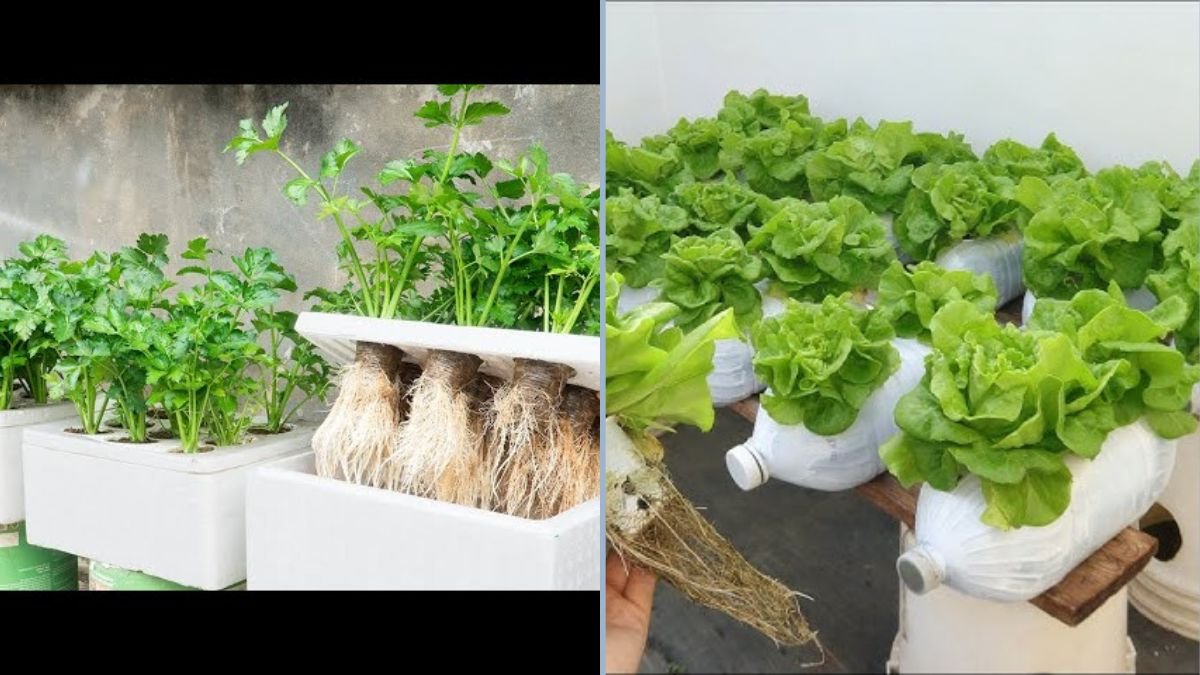
Step 1: Preparing the Plastic Bottles
Plastic bottles are a perfect container for celery because they’re lightweight, reusable, and easy to handle.
- Clean the bottles thoroughly to remove any residue.
- Cut the top portion off the bottle to create an open container for your celery.
- Optionally, make small holes in the bottom for drainage if you plan to add soil.
- Rinse the bottles again before planting.
By repurposing plastic bottles, you’re not only saving money but also reducing environmental waste.
Step 2: Selecting Celery for Regrowth
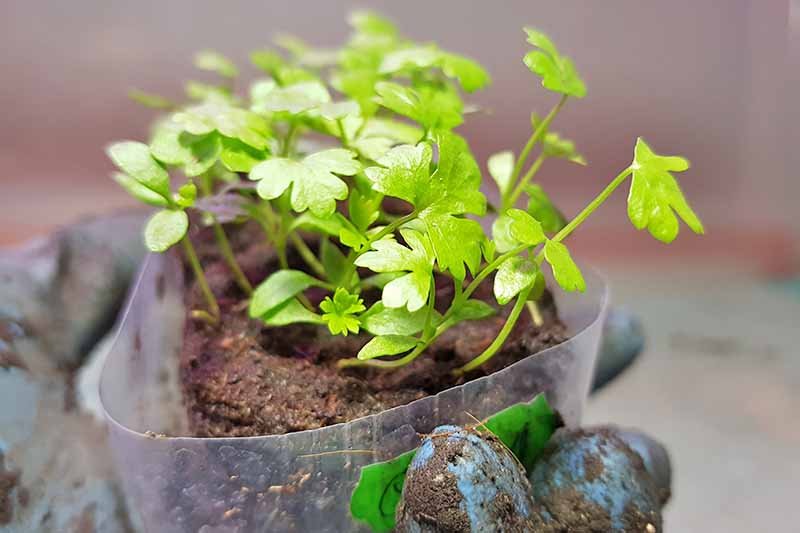
You can regrow celery from leftover stalks purchased from the store. The key is to use the base:
- Cut the base of the celery stalk, leaving about 2–3 inches intact.
- Remove any wilted or damaged outer leaves.
- Ensure the base is firm and fresh—this will form roots and generate new growth.
Even celery that seems past its prime can often regrow successfully if the base is healthy.
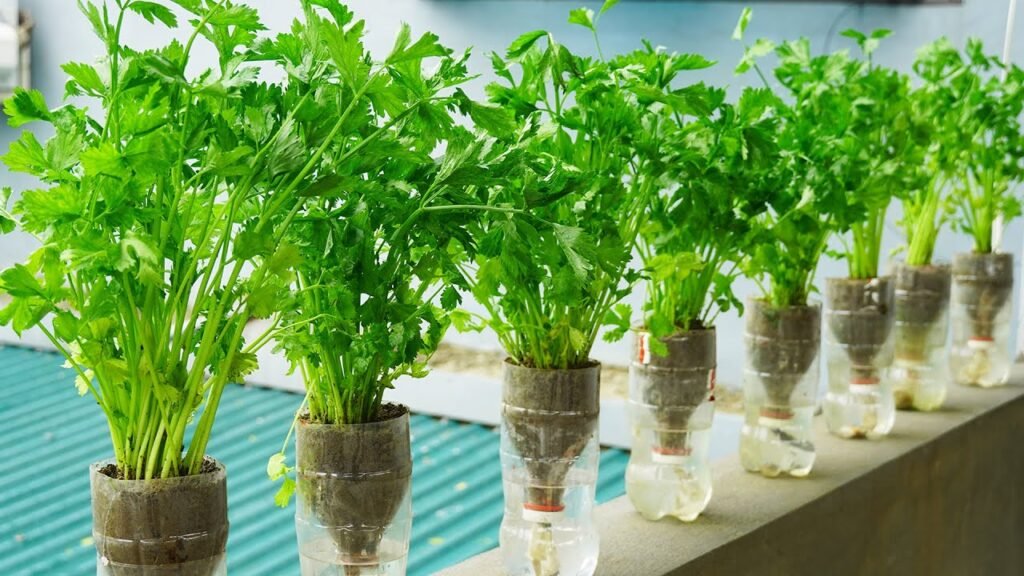
Step 3: Starting Celery in Water
Water propagation is the simplest way to regrow celery before planting it in soil.
- Fill your plastic bottle with water to cover the bottom 1–2 inches.
- Place the celery base in the water, cut side down.
- Position the bottle in a spot that receives bright, indirect sunlight.
- Change the water every 2–3 days to prevent stagnation and encourage healthy root development.
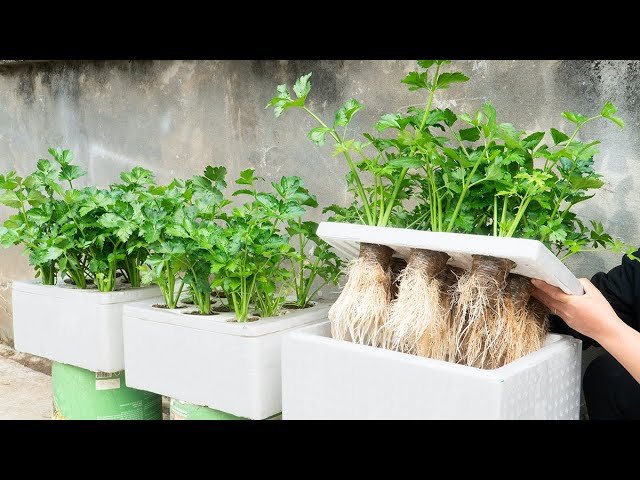
Within a week, you’ll notice small roots beginning to form at the base of the celery. New leaves will also start to emerge from the center, signaling that your celery is ready for the next stage.
Step 4: Transplanting Celery into Soil (Optional)
Once the roots are strong, you can transfer the celery to soil for faster growth, though it can continue to thrive in water.
- Fill a clean plastic bottle or pot with well-draining soil or a mix of soil and sand.
- Create a small hole and gently place the celery base with roots into the soil.
- Water lightly to settle the soil around the roots.
- Position the bottle in a location that receives indirect sunlight.
Transplanting helps celery develop thicker, stronger stalks, but the water-only method also works well for small-scale kitchen gardens.
Step 5: Maintaining Your Celery
Celery is relatively low-maintenance, but consistent care ensures vibrant, healthy growth:
- Watering: Keep the water level consistent if growing in bottles. If using soil, keep it moist but not soggy.
- Sunlight: Celery prefers 4–6 hours of bright, indirect sunlight daily.
- Trimming: Remove any yellow or dead leaves to maintain plant health.
- Fertilization (optional): A diluted liquid fertilizer can promote faster growth, especially if grown in soil.
By following these simple guidelines, your celery will flourish without the need for large spaces or complicated setups.
Step 6: Harvesting Celery
One of the best parts of growing celery at home is being able to harvest fresh stalks whenever you need them:
- Use scissors to cut outer stalks first, leaving the inner stalks to continue growing.
- Always leave the base intact so the plant can regenerate for future harvests.
- Regular harvesting encourages continuous growth and prevents the plant from becoming too crowded.
You’ll quickly notice how rewarding it is to have fresh celery ready for meals without the hassle of store shopping.
Step 7: Extending Growth and Year-Round Supply
By using a few plastic bottles, you can create a continuous supply of celery:
- Succession planting: Start a few celery bases every 2–3 weeks to maintain a steady harvest.
- Rotate bottles: Move bottles to ensure even sunlight exposure and prevent overgrowth.
- Propagate cuttings: Once celery has grown, you can regrow cuttings to create new plants.
With minimal effort, you can enjoy fresh celery year-round without spending extra money or relying on the grocery store.
Common Mistakes to Avoid
Even though this method is simple, beginners sometimes make mistakes:
- Overcrowding bottles: Each celery base needs space for roots and leaves to grow.
- Neglecting water changes: Stagnant water can cause roots to rot and develop bacteria.
- Excessive sunlight: Too much direct sunlight can scorch leaves.
- Harvesting all at once: Always leave some stalks to continue growth.
Avoiding these mistakes ensures a thriving celery garden that produces continuously.
Benefits of Using Plastic Bottles for Celery
This method isn’t just affordable—it’s practical and eco-friendly:
- Recycling: Repurpose plastic bottles and reduce environmental waste.
- Space efficiency: Bottles are compact and fit on windowsills, kitchen counters, or balconies.
- Cost-effective: No need for expensive pots or gardening equipment.
- Portable: Bottles are easy to move to optimize light and space.
Growing celery in plastic bottles makes urban gardening accessible, sustainable, and fun.
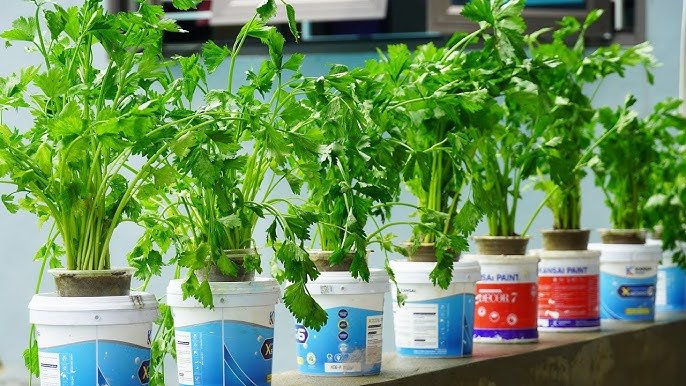
Creative Ideas for Your Celery Bottle Garden
- Kitchen counter display: Keep bottles on a windowsill for easy access while cooking.
- Mini indoor herb garden: Combine celery with other herbs like mint, cilantro, or basil in separate bottles.
- Decorative bottles: Paint or label bottles for an attractive indoor garden setup.
- Gift fresh celery: Small bottle-grown celery plants make practical and eco-friendly gifts.
These creative ideas allow you to enjoy the benefits of homegrown celery while adding a touch of green to your living space.
Final Thoughts
Growing celery at home using small plastic bottles is an easy, cost-effective, and rewarding gardening method. This approach is perfect for beginners, urban dwellers, or anyone looking to enjoy fresh vegetables year-round. By following the simple steps outlined in this guide—preparing bottles, selecting healthy celery bases, propagating in water, and maintaining consistent care—you can create a thriving celery garden without a traditional garden or large pots.
Start today, and you’ll soon enjoy the satisfaction of harvesting vibrant, healthy celery at home. It’s fresh, flavorful, and grown by you—an effortless way to eat healthier and save money!
Word Count: 1,231