Kale, often called the “queen of greens,” is a highly nutritious and versatile leafy vegetable. Packed with vitamins A, C, K, calcium, fiber, and antioxidants, kale is perfect for salads, smoothies, soups, and stir-fries. While it’s a hardy plant, many gardeners shy away from growing kale due to concerns about maintenance, pests, and space limitations.
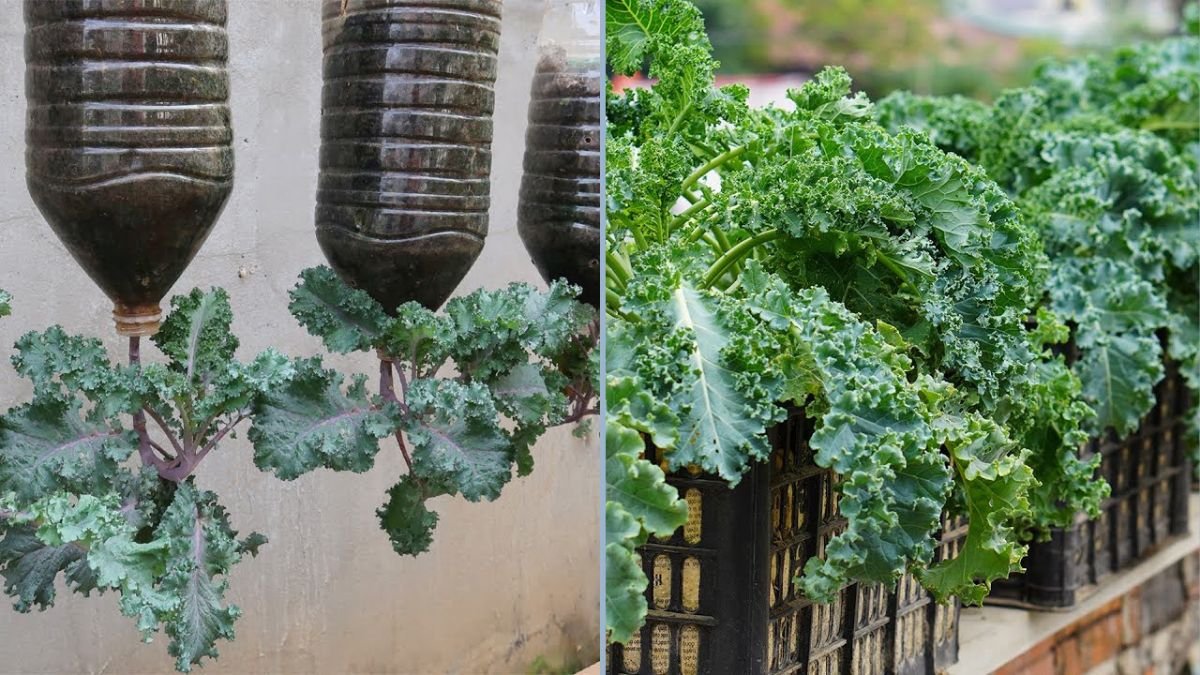
Fortunately, growing kale in plastic bottles offers an innovative, low-maintenance solution that allows anyone to enjoy fresh, homegrown greens without constant care. This method is ideal for urban gardeners, small-space growers, or those looking for a sustainable way to recycle plastic waste. In this guide, we’ll explore step-by-step how to grow kale in plastic bottles efficiently, with minimal effort.
Why Grow Kale in Plastic Bottles?
Growing kale in plastic bottles has multiple advantages:
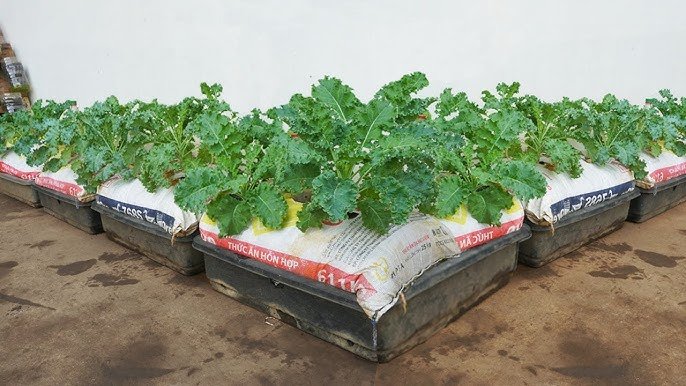
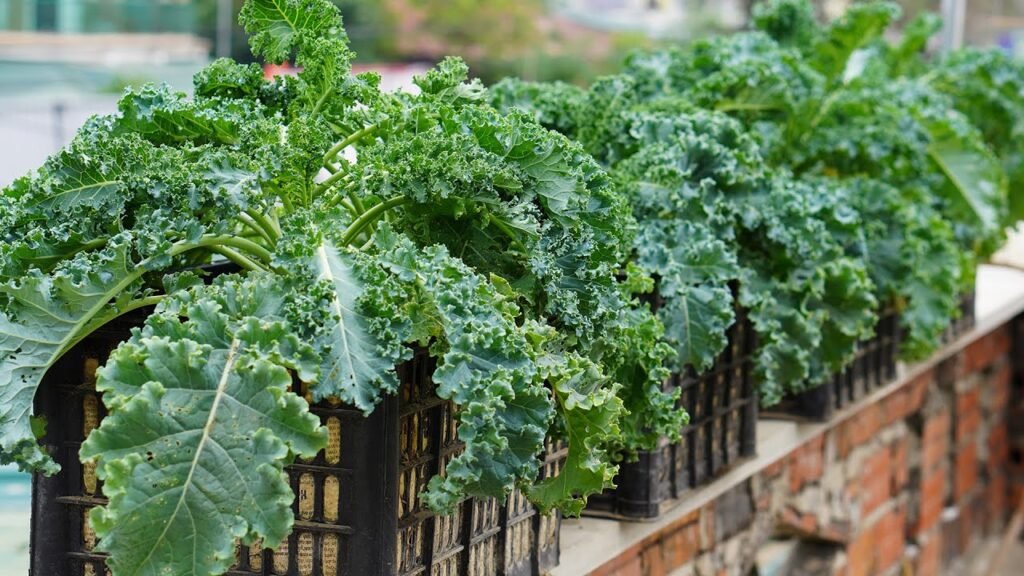
- Space-Saving: Vertical or horizontal arrangements make it possible to grow kale in small balconies, windowsills, or patios.
- Low Maintenance: Once set up, kale plants thrive with minimal care, making it perfect for busy gardeners.
- Recycling Plastic: Repurposing plastic bottles is an eco-friendly way to reduce waste.
- Controlled Environment: Plants in bottles are less prone to soil-borne diseases and pests.
- Fresh, Nutritious Greens: You get access to pesticide-free, nutrient-rich kale all year round.
This approach combines sustainability with practicality, allowing you to grow kale efficiently while contributing to environmental conservation.
Materials Needed
To start growing kale in plastic bottles, you will need:
- Plastic bottles (1–2 liters, preferably transparent or semi-transparent)
- Potting soil or a mixture of compost and garden soil
- Kale seeds or seedlings
- Scissors or a knife
- Watering can or spray bottle
- Optional: coco coir, perlite, or small stones for improved drainage
Optional Accessories: String or rope for vertical hanging, trays for horizontal arrangements, and liquid organic fertilizer.
Step 1: Preparing the Plastic Bottles

Plastic bottles are the foundation of this low-maintenance kale system. Proper preparation ensures healthy growth:
- Clean the Bottles: Remove labels and rinse to eliminate any residues.
- Cut Openings: Create a hole on the side or top large enough to plant your kale seedling.
- Add Drainage Holes: Puncture small holes at the bottom to allow excess water to escape.
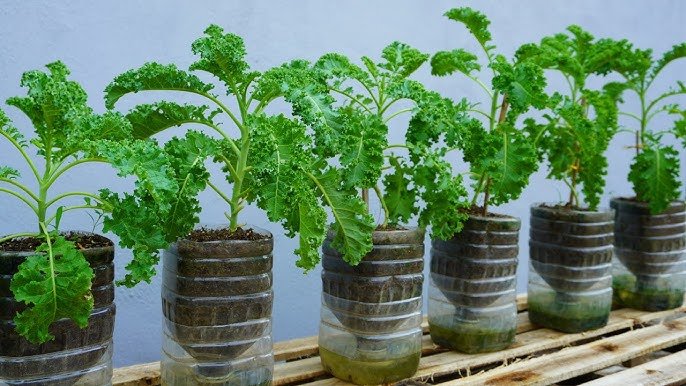
- Optional Vertical Setup: For vertical gardening, cut the top of one bottle and insert it into the bottom of another to stack plants.
Pro Tip: Transparent bottles let you monitor root growth but can also be painted or shaded lightly to prevent algae formation.
Step 2: Selecting Kale Varieties
Choose kale varieties suited for container or bottle gardening:
- Curly Kale: Hardy, compact, and easy to manage in small spaces.
- Lacinato (Dinosaur) Kale: Long, dark green leaves with high nutrient content.
- Red Russian Kale: Mild flavor, tender leaves, and striking purple veins for visual appeal.
Selecting the right variety ensures consistent growth and high yield with minimal care.
Step 3: Planting Kale in Bottles
Planting kale in bottles is simple but requires attention to spacing and soil:
- Fill the bottle with nutrient-rich soil, leaving 1–2 inches from the top.
- Plant kale seeds ¼ inch deep or insert a seedling with roots spread gently.
- Lightly water to settle the soil.
- Ensure the growing tip is exposed for sunlight.
Tip: Avoid overcrowding; one plant per bottle allows adequate root development and airflow.
Step 4: Positioning the Bottles
Light is essential for kale growth:
- Place bottles in a location that receives 6–8 hours of sunlight daily.
- For indoor setups, use grow lights for 10–12 hours a day to promote healthy growth.
- Rotate bottles periodically to ensure even sunlight distribution.
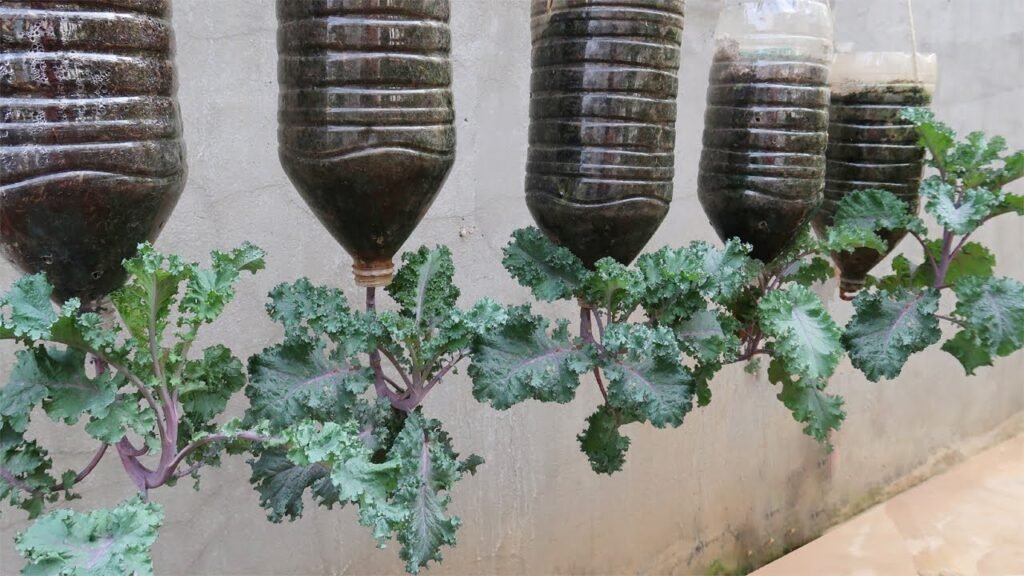
Pro Tip: Hanging bottles vertically saves space and creates an attractive green wall effect.
Step 5: Watering Kale in Bottles
Kale requires consistent moisture but can suffer if overwatered:
- Water gently every 2–3 days or when the top inch of soil feels dry.
- Ensure drainage holes are not blocked to prevent root rot.
- Use a spray bottle for seedlings to avoid displacing soil.
Tip: Mulch or small stones at the top can reduce evaporation and maintain soil moisture.
Step 6: Fertilizing for Low-Maintenance Growth
Even in bottles, kale benefits from occasional feeding:
- Use liquid organic fertilizer or compost tea every 3–4 weeks.
- Avoid over-fertilization, which can cause leafy growth at the expense of flavor.
- Kale is a heavy feeder, so adding compost during planting and top-dressing occasionally ensures steady growth.
Pro Tip: Fertilizing less frequently but consistently is ideal for a low-maintenance system.
Step 7: Managing Pests in Bottle Gardens
Kale is susceptible to aphids, caterpillars, and other small pests:
- Inspect plants weekly for damage.
- Use neem oil or organic insecticidal soap if pests appear.
- Bottle gardens reduce exposure to soil-borne pests, minimizing maintenance.
Tip: Companion planting is optional even in bottles—tiny pots with herbs like basil nearby can repel pests naturally.
Step 8: Pruning and Leaf Harvesting
Minimal care also includes strategic leaf harvesting:
- Pick outer leaves regularly for salads or cooking.
- Avoid cutting the central growing tip, which keeps the plant producing more leaves.
- Removing yellow or damaged leaves encourages healthy growth.
Pro Tip: Continuous harvesting prevents leaves from becoming too tough or bitter.
Step 9: Advantages of Kale in Plastic Bottles
Growing kale in plastic bottles offers unique benefits:
- Minimal Maintenance: Once set up, kale grows without frequent attention.
- Space Optimization: Ideal for balconies, windowsills, or small apartments.
- Water Efficiency: Bottles retain moisture well, reducing watering frequency.
- Sustainability: Recycles plastic and reduces the need for soil amendments.
- Aesthetic Appeal: Creates a vibrant, vertical garden or kitchen greenery.
This system is perfect for anyone wanting fresh, nutritious kale without spending hours tending a garden.
Step 10: Tips for a Truly Effortless Kale Garden
- Use Quality Soil: A rich potting mix reduces the need for frequent fertilization.
- Select Hardy Varieties: Curly or lacinato kale thrives with less care.
- Monitor Watering: Check moisture weekly instead of daily to reduce effort.
- Harvest Strategically: Picking outer leaves encourages continuous growth.
- Protect from Extreme Weather: Move bottles indoors or cover them during frost or heat waves.
- Stack or Hang Bottles: Vertical arrangement maximizes yield in small spaces.
Following these tips ensures that kale continues to produce healthy leaves with minimal effort.
Conclusion
Growing kale in plastic bottles is a game-changer for urban gardeners, busy individuals, or anyone seeking a low-maintenance way to enjoy fresh greens. By using recycled bottles, proper soil, and minimal care techniques, you can create a productive, sustainable, and aesthetically pleasing garden—even in small spaces.
This method combines the benefits of vertical gardening, container planting, and sustainability to produce nutrient-rich kale with little effort. With minimal watering, occasional fertilization, and simple harvesting, you can enjoy a steady supply of fresh kale without worrying about constant upkeep.
Once you experience growing kale in plastic bottles, you’ll see how simple, eco-friendly, and rewarding low-maintenance gardening can be—transforming even the smallest spaces into a green, thriving vegetable