Growing your own food at home is both rewarding and environmentally friendly. One of the easiest and most satisfying vegetables to regrow is scallion, also known as green onions. With just a few kitchen scraps and a recycled plastic bottle, you can create a sustainable, space-saving hanging garden that keeps fresh scallions ready for your meals all year round. In this guide, we’ll show you step by step how to regrow scallions from cuttings using recycled plastic bottles, making gardening accessible even in small spaces.
Why Regrow Scallions?
Regrowing scallions isn’t just a fun experiment—it has real benefits for your kitchen, wallet, and the environment. Here’s why you should try it:
- Cost-effective: Instead of buying scallions repeatedly, you can regrow them indefinitely from scraps.
- Reduces waste: Kitchen scraps that would normally be thrown away can now be transformed into fresh produce.
- Convenient: Having fresh scallions in your kitchen makes cooking easier and more flavorful.
- Space-saving: Using a hanging plastic bottle garden is perfect for apartments or small backyards.
Scallions are hardy plants that regenerate quickly, making them one of the easiest vegetables for indoor or vertical gardening.
Materials You’ll Need
Before starting, gather the following materials:
- Fresh scallion cuttings (roots attached)
- A recycled plastic bottle (1 or 2-liter bottles work best)
- Scissors or a craft knife
- Water
- String or twine for hanging
- Optional: soil or hydroponic solution
Using recycled materials not only helps the environment but also keeps this project cost-effective and creative.
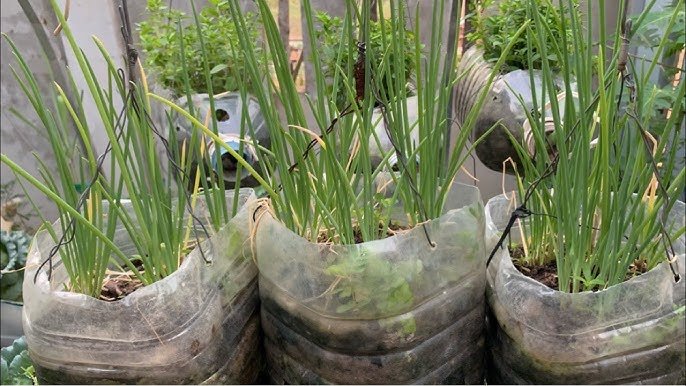
Step 1: Prepare the Plastic Bottle
Start by preparing your plastic bottle:
- Rinse the bottle thoroughly to remove any residues.
- Using scissors or a craft knife, carefully cut the bottle horizontally. You can create two options:
- Cut the top third of the bottle to use as a funnel for water.
- Cut a small section near the bottom to hold the scallion roots directly.
- Poke a few small holes in the bottom if you plan to let excess water drain or to hang it vertically for better air circulation.
Make sure the cut edges are smooth to avoid injuring the scallion roots when placed inside.
Step 2: Prepare the Scallion Cuttings
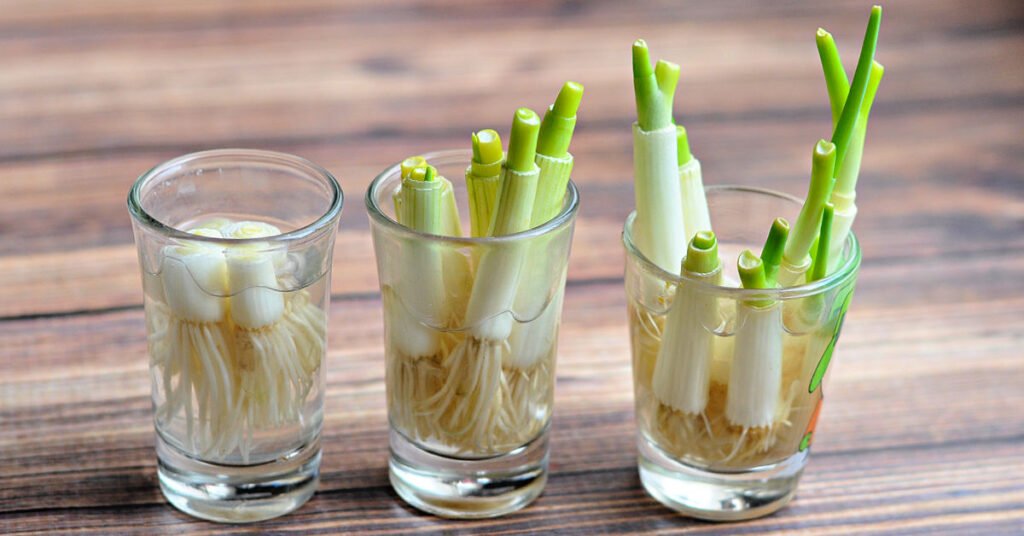
Select healthy scallion cuttings with roots intact. If you only have the green part of scallions, you can still regrow them, but those with white roots will regenerate faster.
- Trim the scallion tops if necessary, leaving about 1–2 inches above the root.
- Place the scallion cuttings in a glass of water for a few days until roots start to develop if they are not already strong.
Healthy roots are key to ensuring fast regrowth and a strong plant.
Step 3: Plant Scallions in the Plastic Bottle
You have two main options for growing: water-based (hydroponic) or soil-based.
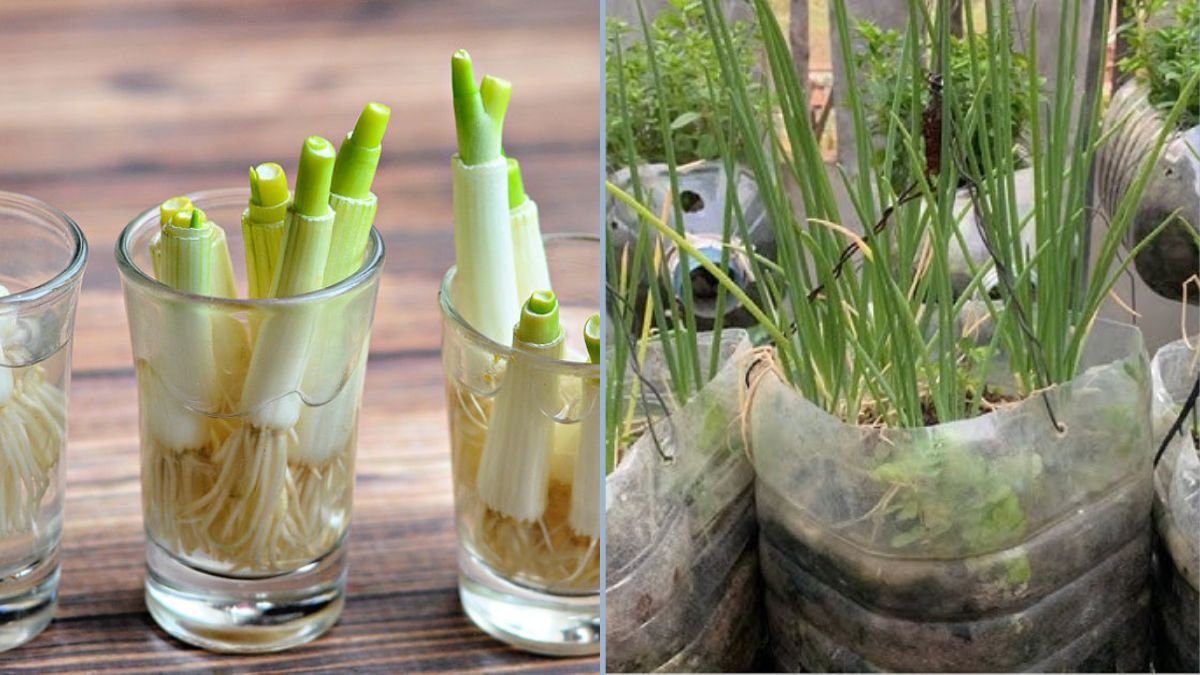
Option 1: Water-Based Regrowth
- Place the scallion roots directly in water inside the bottle.
- Ensure the roots are fully submerged but avoid letting the green stems touch the water.
- Keep the bottle in a sunny spot near a window.
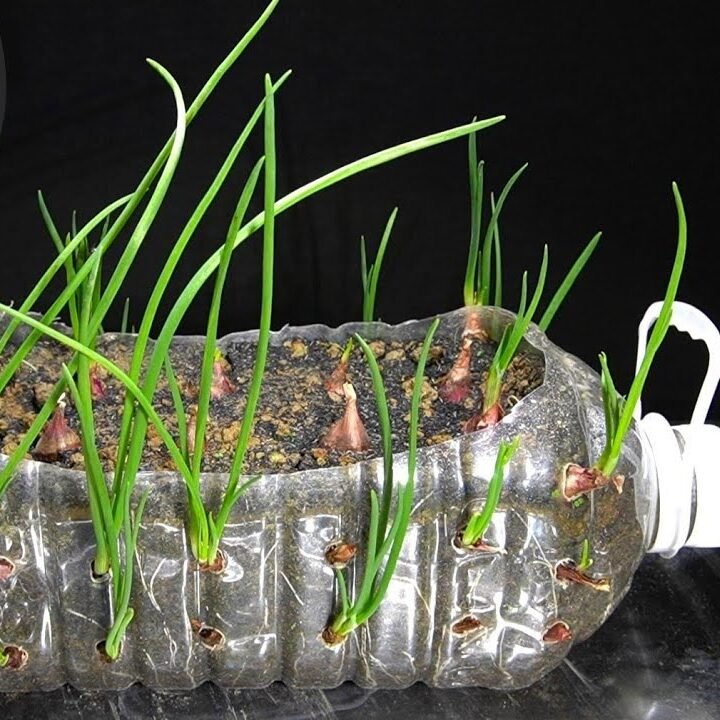
Option 2: Soil-Based Regrowth
- Fill the bottle with potting soil or compost.
- Make small holes in the soil for the scallion roots.
- Cover lightly with soil and water gently.
- Place in a sunny spot.
Water-based regrowth is faster and requires less maintenance, while soil-based gives a more natural growth environment.
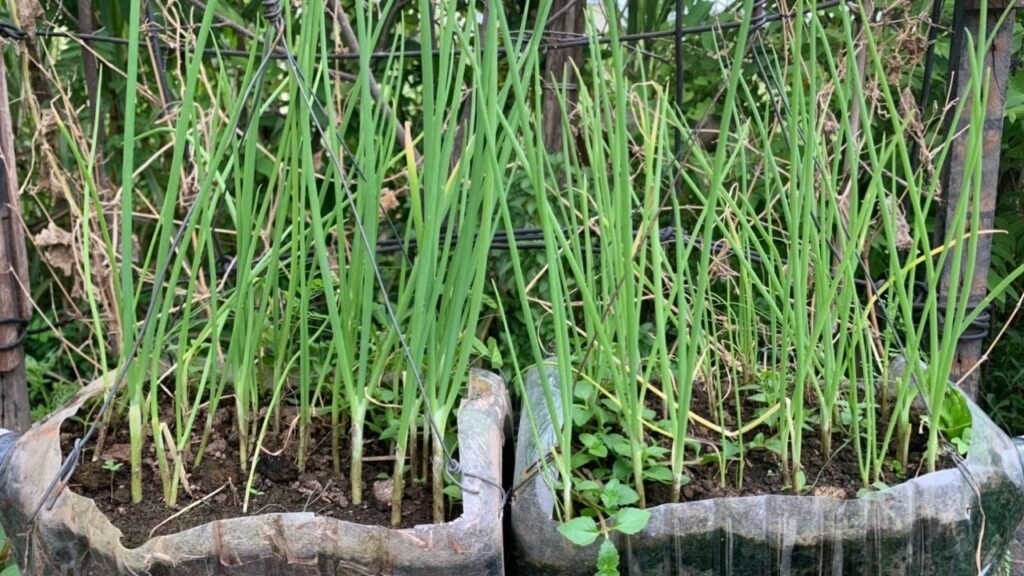
Step 4: Hang Your Scallion Garden
Using string or twine, create a loop to hang the bottle vertically. This not only saves space but also creates an attractive mini vertical garden.
Tips for hanging:
- Choose a location with sufficient sunlight, ideally 4–6 hours a day.
- Avoid direct scorching sunlight if your bottle is clear, as it may overheat the roots.
- Ensure the bottle is stable and not swinging excessively to prevent root damage.
Hanging the bottles allows gravity to help drain excess water while keeping the scallions healthy.
Step 5: Care and Maintenance
Once your scallions are planted, they require minimal care:
- Watering: Keep the water level consistent. If growing in soil, ensure the soil is moist but not waterlogged.
- Sunlight: Place in bright, indirect sunlight. Too much direct sun can scorch delicate leaves.
- Trimming: Trim the green tops regularly to encourage new growth. You can use the trimmings in your cooking, creating a continuous cycle of fresh produce.
- Cleaning: Change the water every few days in water-based setups to prevent stagnation and bacteria growth.
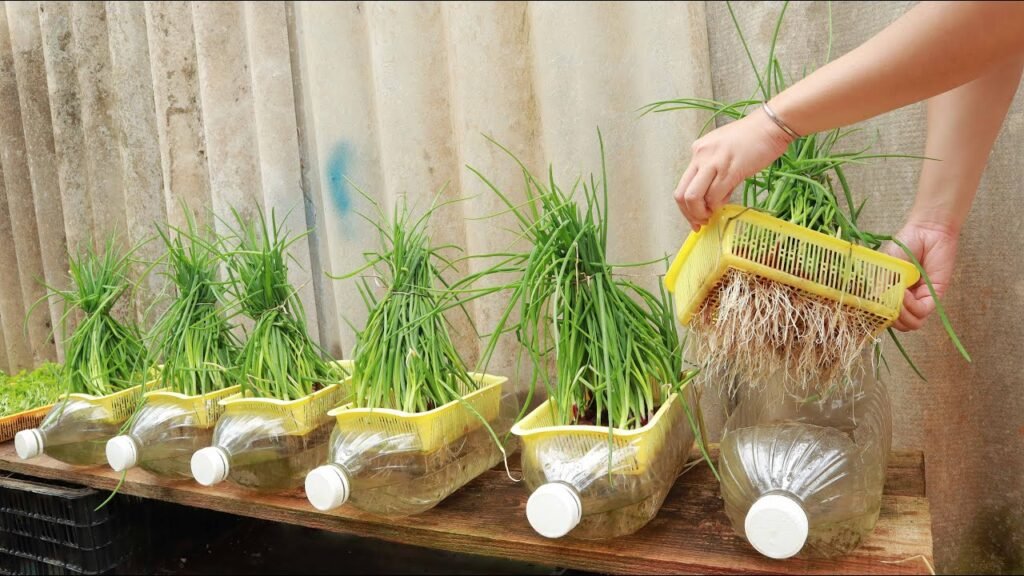
Step 6: Harvesting
Your scallions should be ready to harvest in as little as 7–14 days depending on growing conditions. Simply cut the green tops about 1–2 inches above the roots. The roots will continue to produce new shoots, giving you a constant supply.
Pro tip: Never pull the entire plant out of the bottle; leaving roots intact ensures continuous regrowth.
Benefits of Vertical Hanging Scallion Gardens
- Saves Space: Perfect for apartments, balconies, or small kitchens.
- Sustainable: Reduces food waste by reusing scallion scraps.
- Decorative: Adds greenery to your home in a creative way.
- Cost-Efficient: Minimal investment for a long-term harvest.
This method is not only practical but also eco-friendly, turning single-use plastic bottles into thriving mini gardens.
Troubleshooting Common Issues
- Yellowing leaves: Usually caused by too much water or insufficient sunlight. Adjust water levels and light exposure.
- Slower growth: Check that roots are healthy and not submerged in dirty water. Nutrient solution or occasional soil-based growth can help.
- Bacterial growth in water: Change water regularly and ensure the container is clean.
With a little care, these issues can be easily avoided, making the process simple and beginner-friendly.
Why This Method Works
Scallions are hardy perennials that naturally regrow from their roots. By mimicking their natural environment and providing consistent moisture and sunlight, you are essentially giving them everything they need to continue growing. The plastic bottle acts as a mini greenhouse, protecting the roots while keeping them hydrated.
Conclusion
Regrowing scallions from cuttings in recycled plastic bottles is a simple, sustainable, and rewarding gardening project. It allows you to:
- Reduce kitchen waste
- Save money
- Have a continuous supply of fresh scallions
- Create an attractive and eco-friendly vertical garden
Whether you’re an experienced gardener or a beginner, this method provides a fun and practical way to bring greenery into your home. Start today, and you’ll be surprised at how quickly your scallions multiply. With minimal investment and effort, a few kitchen scraps can transform into a flourishing indoor garden.