If you’ve ever enjoyed a bowl of pasta made from vegetables instead of noodles, chances are you’ve already met the spaghetti squash — nature’s own version of low-carb, gluten-free spaghetti! This golden-yellow winter squash transforms into long, noodle-like strands when cooked, making it both a delicious and healthy alternative to traditional pasta.
But what many people don’t realize is just how easy it is to grow spaghetti squash at home — even if you’re new to gardening. With the right care, this plant rewards you with multiple fruits per vine and months of tasty, shelf-stable produce.
In this post, we’ll walk you through everything you need to know to grow spaghetti squash successfully — from planting seeds to harvesting mature fruits — using simple, organic, and space-saving methods that anyone can master.
What Makes Spaghetti Squash So Special?
Before diving into planting, let’s take a moment to appreciate this unique vegetable.
Spaghetti squash (Cucurbita pepo) is a winter squash, meaning it’s harvested when the rind hardens and stored for months without refrigeration. Inside, the golden flesh separates into delicate strands that resemble pasta when cooked — hence the name.
Nutritional Benefits
- Low in Calories: A one-cup serving has fewer than 45 calories.
- High in Fiber: Great for digestion and keeping you full longer.
- Packed with Vitamins: Rich in vitamin C, potassium, and beta-carotene.
- Gluten-Free & Low-Carb: A perfect pasta substitute for health-conscious eaters.
Beyond its nutritional perks, spaghetti squash is a gardener’s dream — fast-growing, hardy, and productive with minimal effort.
Step 1: Choosing the Right Variety
Spaghetti squash comes in several varieties, each with its own strengths. For home gardens, choose compact or vining types depending on your space.
Recommended Varieties:
- ‘Vegetable Spaghetti’: The classic and most widely grown type.
- ‘Tivoli F1’: Compact, high-yield hybrid ideal for small gardens and containers.
- ‘Stripetti’: A cross between spaghetti squash and delicata — sweeter and more tender.
- ‘Hasta La Pasta’: Early-maturing and great for short-season climates.
If you live in a cooler area or want to extend your season, look for early-maturing hybrids that can produce fruit in 75–85 days.
Step 2: Preparing the Soil
Spaghetti squash thrives in warm, fertile, well-draining soil. It’s a hungry plant that loves rich organic matter, so preparing your soil properly sets you up for success.
Ideal Conditions:
- Soil pH: 6.0–6.8
- Temperature: Soil should be at least 70°F (21°C) before planting.
- Soil Type: Loamy soil enriched with compost or well-rotted manure.
How to Prepare the Bed:
- Choose a sunny spot that gets at least 6–8 hours of sunlight per day.
- Loosen the soil 12 inches deep.
- Mix in compost or aged manure (about 2 inches thick).
- Create small mounds or hills spaced about 3–4 feet apart — these improve drainage and warmth.
If growing in containers, use a 20–25 gallon pot and high-quality potting mix with compost.
Step 3: Planting the Seeds
Once the soil is warm and all danger of frost has passed, you can plant spaghetti squash directly outdoors. Alternatively, start seeds indoors 3–4 weeks before transplanting if your growing season is short.
Planting Instructions:
- Depth: Sow seeds 1 inch deep.
- Spacing: 3 seeds per mound; thin to the strongest seedling later.
- Water: Keep the soil consistently moist but not waterlogged.
Transplant seedlings outdoors when they have two true leaves and temperatures stay above 60°F (16°C).
Pro Tip: If growing vertically (which works wonderfully for spaghetti squash), position a strong trellis or fence near the planting site before sowing to avoid disturbing roots later.
Step 4: Watering and Feeding
Spaghetti squash loves moisture but hates soggy roots. Consistency is key — erratic watering leads to cracked fruits and poor flavor.
Watering Tips:
- Frequency: Deeply water once or twice per week, depending on rainfall.
- Method: Use drip irrigation or a soaker hose to target the roots, keeping leaves dry.
- Mulching: Add 2–3 inches of straw or compost mulch to conserve water and prevent weeds.
Feeding:
Feed with organic fertilizer or compost tea every 2–3 weeks. Here’s a good schedule:
- Early Growth: Use nitrogen-rich fertilizer to encourage vine development.
- After Flowering: Switch to a phosphorus- and potassium-rich mix to support flowering and fruiting.
A little patience and nutrition go a long way in producing multiple healthy, delicious squashes.
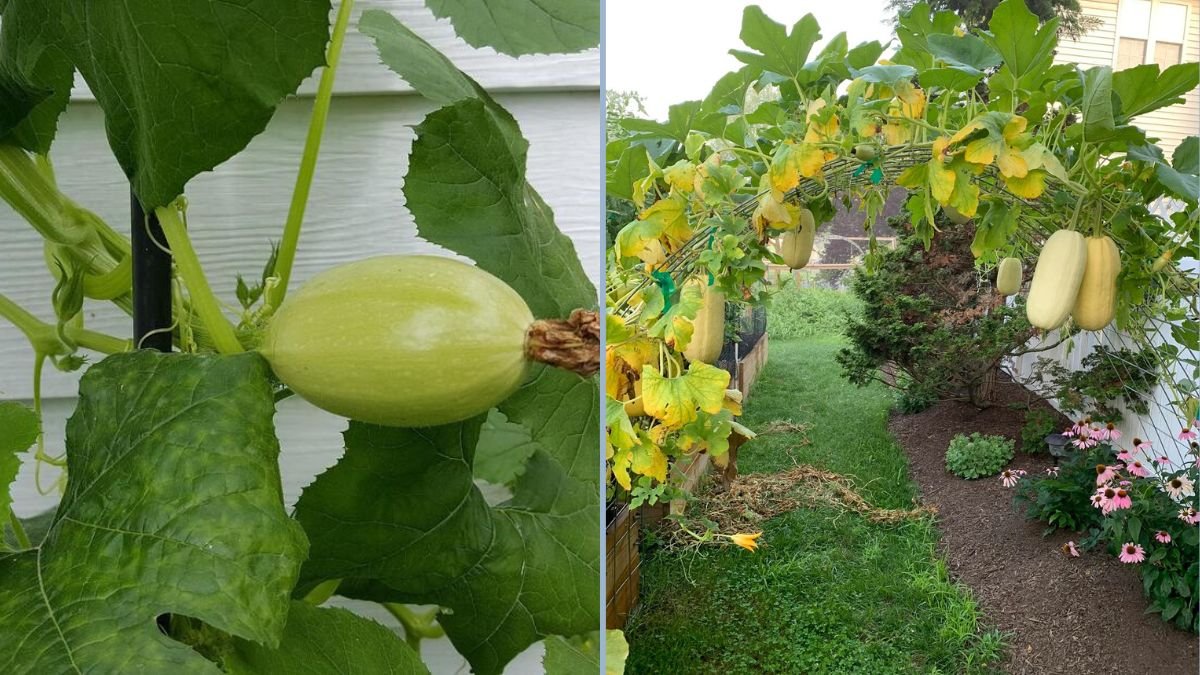
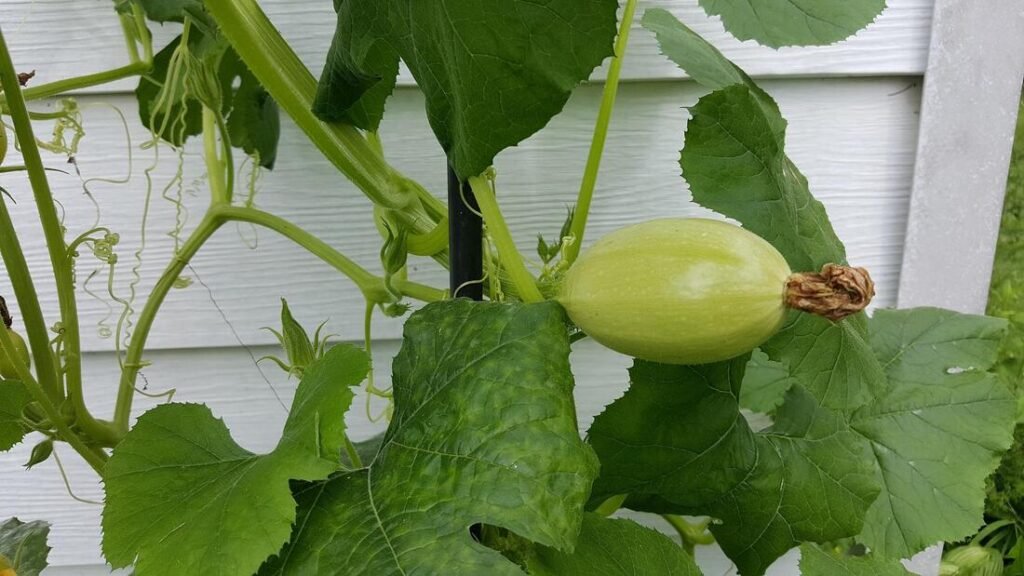
Step 5: Training the Vines
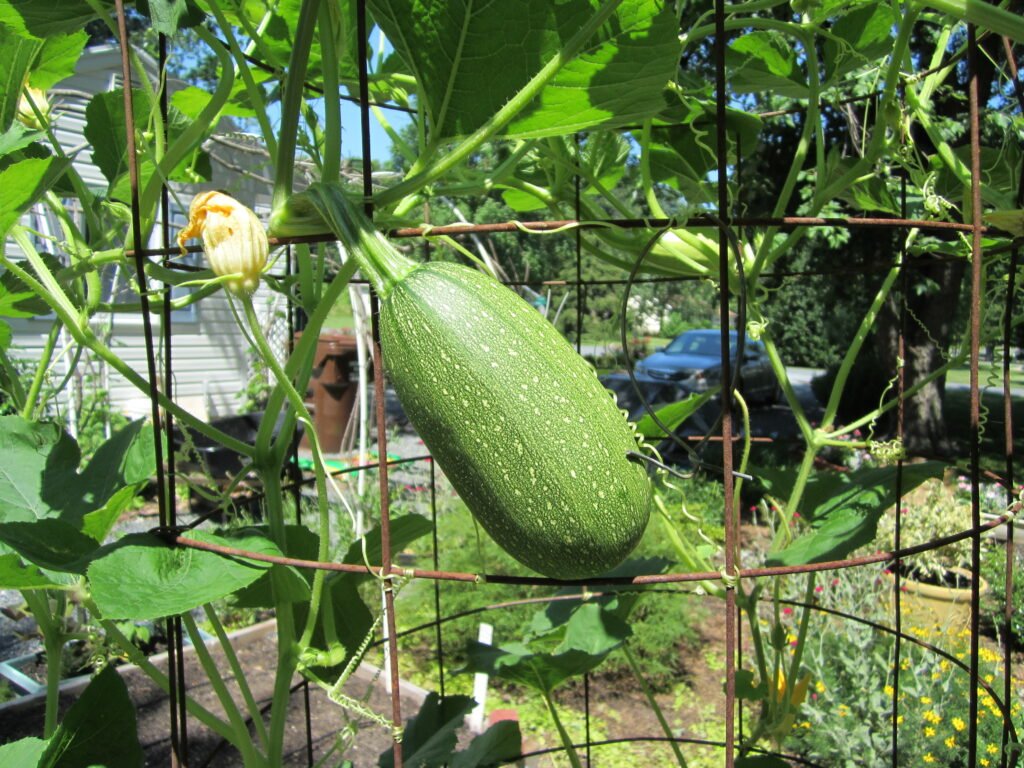
Spaghetti squash vines can spread up to 10 feet or more, but training them vertically helps save space and keeps fruits off the ground — preventing rot and pest damage.
Vertical Growing Steps:
- Use a sturdy trellis, garden arch, or fence — spaghetti squash fruits weigh 2–4 pounds, so ensure solid support.
- Gently tie vines to the structure using soft ties or twine.
- As fruits form, use slings (made from old T-shirts or mesh bags) to cradle them and relieve pressure from the stems.
- Prune excess side shoots once your main vines have several developing fruits.
This approach keeps the plants healthy, increases air circulation, and makes harvesting much easier.
Step 6: Flowering and Pollination
Spaghetti squash plants produce both male and female flowers, and pollination is essential for fruit set. Bees are usually the heroes of this stage, but you can lend a hand if pollinator activity is low.
Hand-Pollination Steps:
- Identify male flowers (on thin stems) and female flowers (with tiny squashes behind them).
- In the morning, pick a male flower and gently transfer its pollen to the female flower’s center.
- Repeat every few days during peak bloom to ensure good fruit set.
Pollinated flowers will quickly swell into small squashes — a sign your garden is thriving!
Step 7: Managing Pests and Diseases
Spaghetti squash is fairly resilient but can attract common garden pests. Prevention and observation are key.
Common Pests:
- Squash Bugs: Remove by hand; use neem oil spray weekly.
- Cucumber Beetles: Trap crops (like radishes or nasturtiums) can divert them.
- Aphids: A strong water spray or insecticidal soap keeps them under control.
Common Diseases:
- Powdery Mildew: Prevent with good spacing, airflow, and a 1:9 milk-to-water spray.
- Fungal Rot: Avoid overwatering and keep fruit elevated on mulch or trellises.
A healthy soil ecosystem (with compost and beneficial insects) is your best long-term defense.
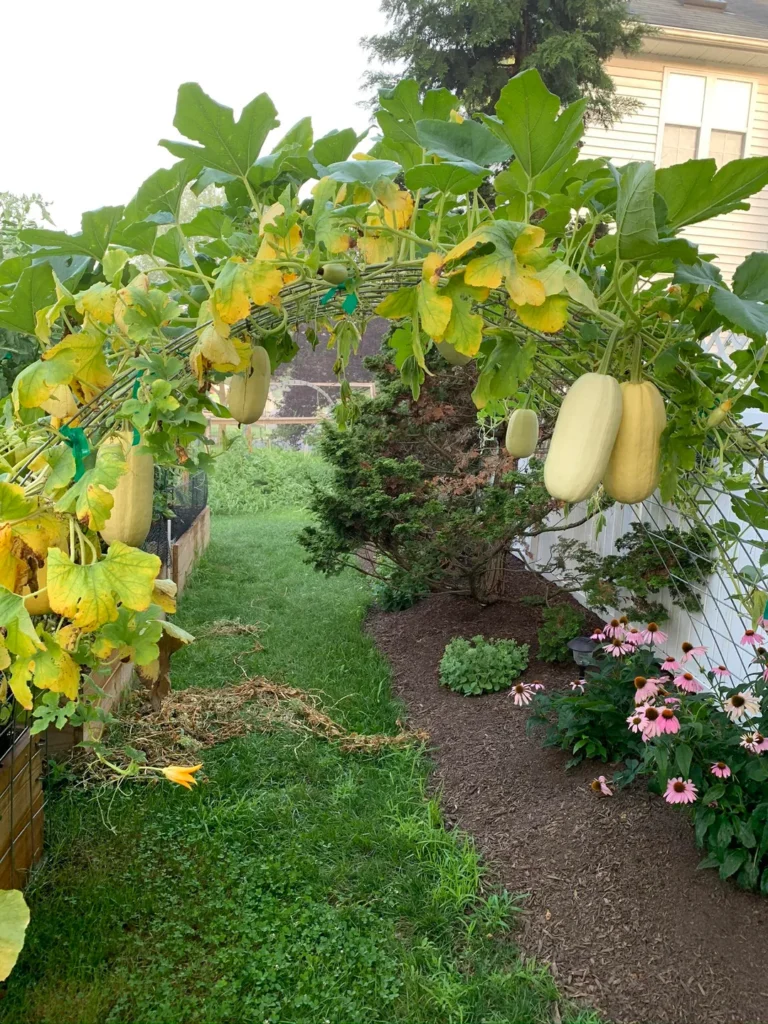
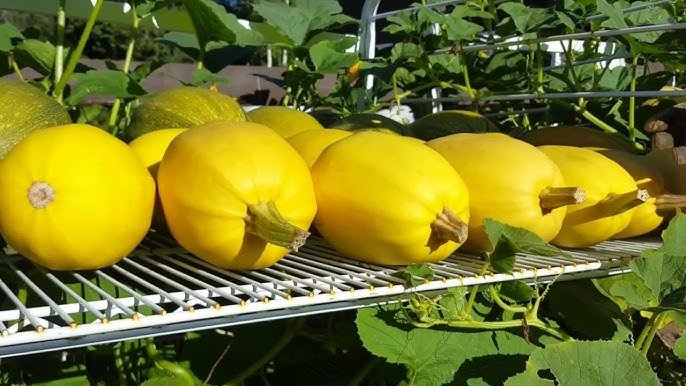
Step 8: Harvesting Spaghetti Squash
Harvest time is the most rewarding part — and knowing exactly when to pick makes all the difference in flavor and storage life.
When to Harvest:
- The rind turns deep yellow or light orange and becomes hard.
- The skin resists scratching with your fingernail.
- The stem begins to dry and crack.
Cut the squash with sharp pruning shears, leaving 2 inches of stem attached. Handle carefully to avoid bruising.
Curing and Storage:
- Place squashes in a warm, dry place (80°F / 27°C) for 10–14 days to cure.
- Then store them in a cool, dark area (50–60°F / 10–15°C).
Properly cured spaghetti squash can last up to 3 months, making it a fantastic pantry staple for winter meals.
Step 9: Cooking and Enjoying Your Harvest
Once harvested, spaghetti squash is endlessly versatile in the kitchen.
Simple Cooking Method:
- Cut squash in half lengthwise and scoop out the seeds.
- Brush with olive oil, sprinkle with salt, and place face-down on a baking sheet.
- Roast at 400°F (200°C) for 35–45 minutes until tender.
- Use a fork to scrape the flesh into “spaghetti” strands.
Flavor Pairings:
- Toss with olive oil, garlic, and basil for a light, summery dish.
- Mix with tomato sauce and grilled vegetables for a classic pasta feel.
- Add sautéed mushrooms and spinach for a hearty vegan meal.
- Top with parmesan or nutritional yeast for extra richness.
Once you taste your homegrown spaghetti squash, you’ll understand why so many gardeners grow it year after year.
Step 10: Saving Seeds for Next Season
If you grew an open-pollinated or heirloom variety, you can save seeds for next year.
- Scoop seeds from a ripe squash.
- Rinse thoroughly and remove pulp.
- Dry on a paper towel for a week.
- Store in a cool, dry place — they’ll last 3–4 years.
Saving seeds ensures you always have fresh, organic squash ready for the next growing season.
Final Thoughts
Growing spaghetti squash at home is truly one of the easiest and most rewarding gardening projects you can try. With a little planning, patience, and care, you’ll be rewarded with a bounty of golden fruits that are delicious, nutritious, and long-lasting.
Whether you’re gardening in a backyard or a balcony, this hardy plant adapts beautifully — especially when trained vertically. From seed to harvest, spaghetti squash proves that sometimes, the simplest crops bring the biggest joy.
So grab your seeds, warm up your soil, and start growing your own spaghetti from the garden — it’s easier than you think.