If you’re looking for a unique, easy-to-grow, and delicious vegetable that thrives even in limited space, the Jerusalem artichoke — also known as sunchoke or sunroot — is a great choice. Growing it in containers gives you full control over its growth while allowing you to enjoy a bountiful harvest of crisp, nutty tubers.
This guide will walk you through everything you need to know about planting Jerusalem artichokes in containers, from choosing the right tubers and soil mix to harvesting your homegrown sunchokes.
What is the Jerusalem Artichoke?
Despite the name, the Jerusalem artichoke isn’t from Jerusalem, and it’s not related to the globe artichoke. It’s actually a type of sunflower that grows underground tubers instead of large flower heads. These tubers are the edible part, known for their sweet, nutty flavor and versatility in the kitchen.
Above ground, the plant looks like a sunflower — tall stems topped with bright yellow flowers. Below ground, it produces clusters of knobbly, potato-like tubers that can be roasted, mashed, sautéed, or eaten raw.
Nutritionally, Jerusalem artichokes are rich in inulin, a type of carbohydrate that acts as a prebiotic, feeding beneficial gut bacteria. They’re also high in iron, potassium, and dietary fiber.
Why Grow Jerusalem Artichokes in Containers?

Growing Jerusalem artichokes in containers offers several major advantages, especially if you live in a small space or want to keep the plant under control.
- Prevents invasive spreading:
In open ground, Jerusalem artichokes can spread aggressively through leftover tubers. Container growing keeps them confined. - Easier harvesting:
When the tubers are in pots, you can simply dump out the container or gently dig through the soil without damaging the roots. - Flexible placement:
Containers can be moved to catch more sunlight or protect the plants from strong winds. - Ideal for balconies or patios:
You don’t need a garden bed — just a sunny spot and a big enough container. - Better soil control:
You can provide rich, well-draining soil that promotes healthy tuber growth.
Choosing the Right Container and Soil

Container Size
The most important factor for success is space. The tubers need room to expand, and the plant’s tall stems need stability.
- Use a large container at least 45 cm (18 inches) deep and wide.
- Make sure it has drainage holes to prevent water from pooling.
- One or two tubers per container is plenty. Overcrowding will lead to smaller tubers.
Soil Mix
Jerusalem artichokes prefer well-draining, fertile soil. A mix of garden soil, compost, and coarse sand or perlite works beautifully.
A good recipe:
- 50% garden soil or potting mix
- 30% compost or organic matter
- 20% coarse sand or perlite for drainage
Avoid heavy clay soils or mixes that stay soggy, as this can cause the tubers to rot.
Location
Place the container in a sunny spot — at least 6 to 8 hours of direct sunlight daily. These plants love warmth and light. If you’re growing them on a balcony, position the container where it won’t get knocked over by wind since the stems can grow quite tall.
Step-by-Step Guide to Planting Jerusalem Artichokes in Containers
1. Get Healthy Tubers
Start with firm, plump Jerusalem artichoke tubers. You can buy them from a garden center or use leftover store-bought ones, as long as they haven’t been treated to prevent sprouting. Each tuber should have a few “eyes” — small buds that will grow into shoots.
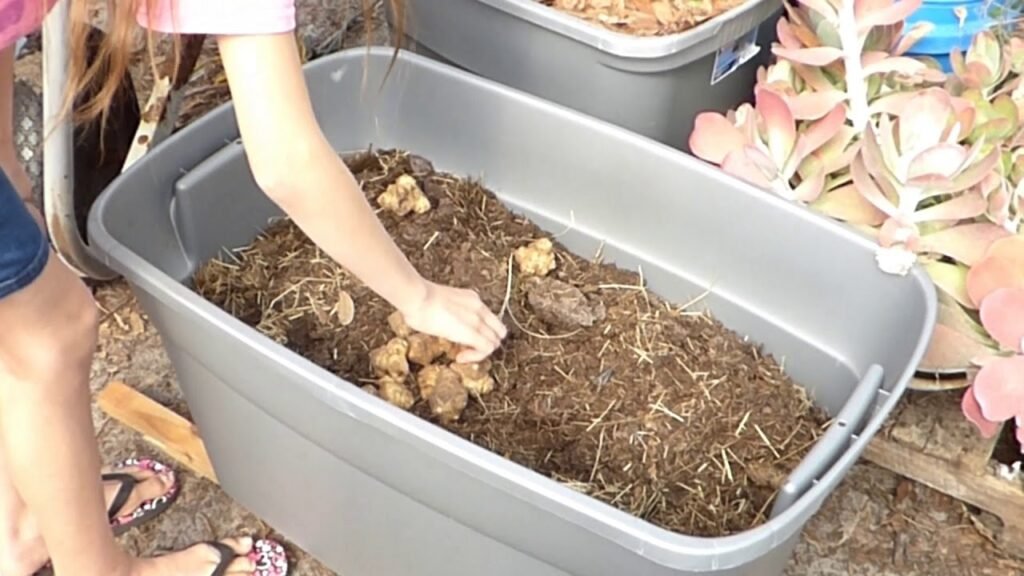
2. Prepare the Container
Fill your container with the soil mix, leaving about two inches of space at the top. Moisten the soil slightly so it feels damp but not soggy.
3. Plant the Tubers
Place the tubers about 10 to 15 cm (4 to 6 inches) deep, with the eyes facing upward. If you’re planting more than one in the same pot, space them several inches apart to give them room to grow.
Cover them gently with soil and firm it down lightly.
4. Water Thoroughly
Water the container well after planting to help the soil settle. Make sure excess water drains freely from the bottom. The soil should remain evenly moist but never waterlogged.
5. Label and Place
Label your container (especially if you’re growing other crops) and move it to a sunny, sheltered spot. Jerusalem artichokes like warmth, so a location with consistent sunlight is best.
Caring for Your Potted Jerusalem Artichokes
Once planted, these hardy plants require only minimal care.
Watering
Keep the soil consistently moist during the growing season. Containers dry out faster than garden beds, so check moisture regularly. However, avoid overwatering — soggy soil can rot the tubers.
Feeding
Jerusalem artichokes aren’t heavy feeders, but a monthly feeding of compost tea or organic liquid fertilizer can encourage strong growth.
Mulching
Add a layer of mulch or straw on top of the soil to help retain moisture and keep the tubers cool in hot weather.
Support
As the plants grow tall (often up to 6–10 feet), they may need staking or support to prevent them from falling over, especially in windy areas.
Pest and Disease Control
They are relatively pest-free. Occasionally, aphids or slugs may appear, but they rarely cause serious damage. Ensure proper air circulation to prevent mildew on the leaves.
Harvesting Jerusalem Artichokes
The fun part comes in late autumn or early winter when the foliage begins to die back. That’s your signal to harvest.
- Wait until after the first frost — the cold enhances the sweetness of the tubers.
- Cut back the stems to about 10 cm (4 inches) above the soil.
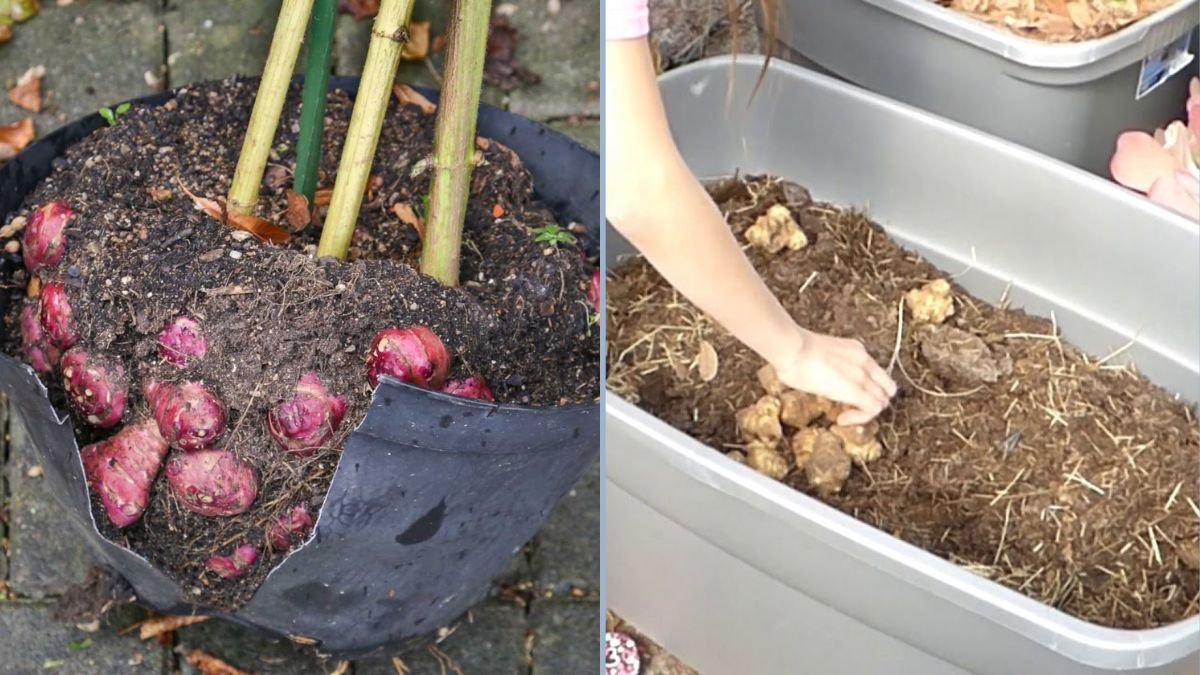
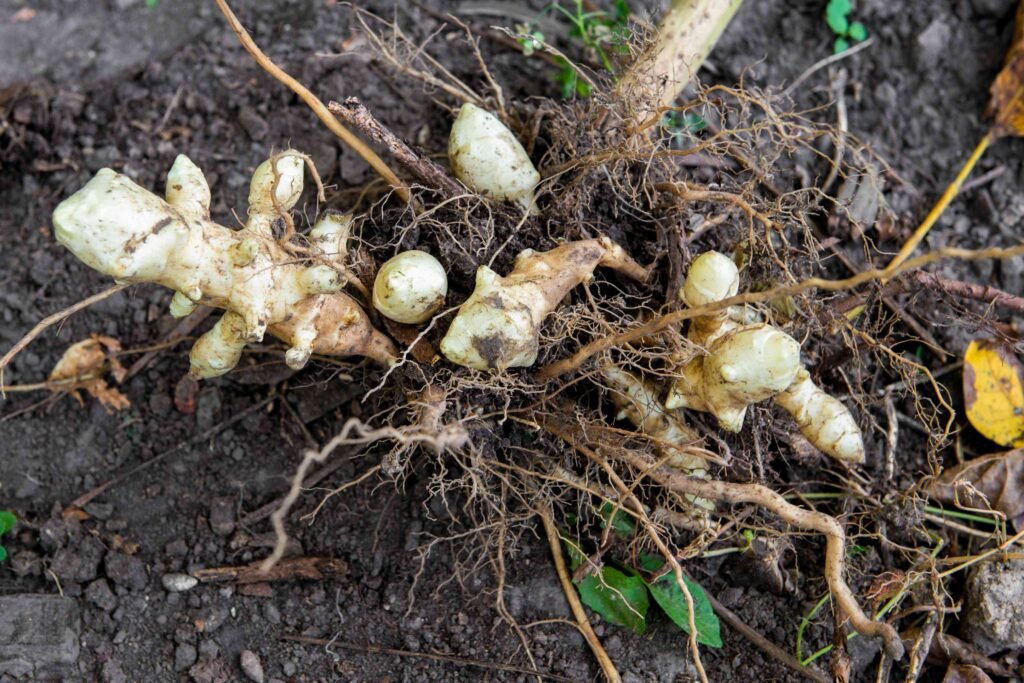
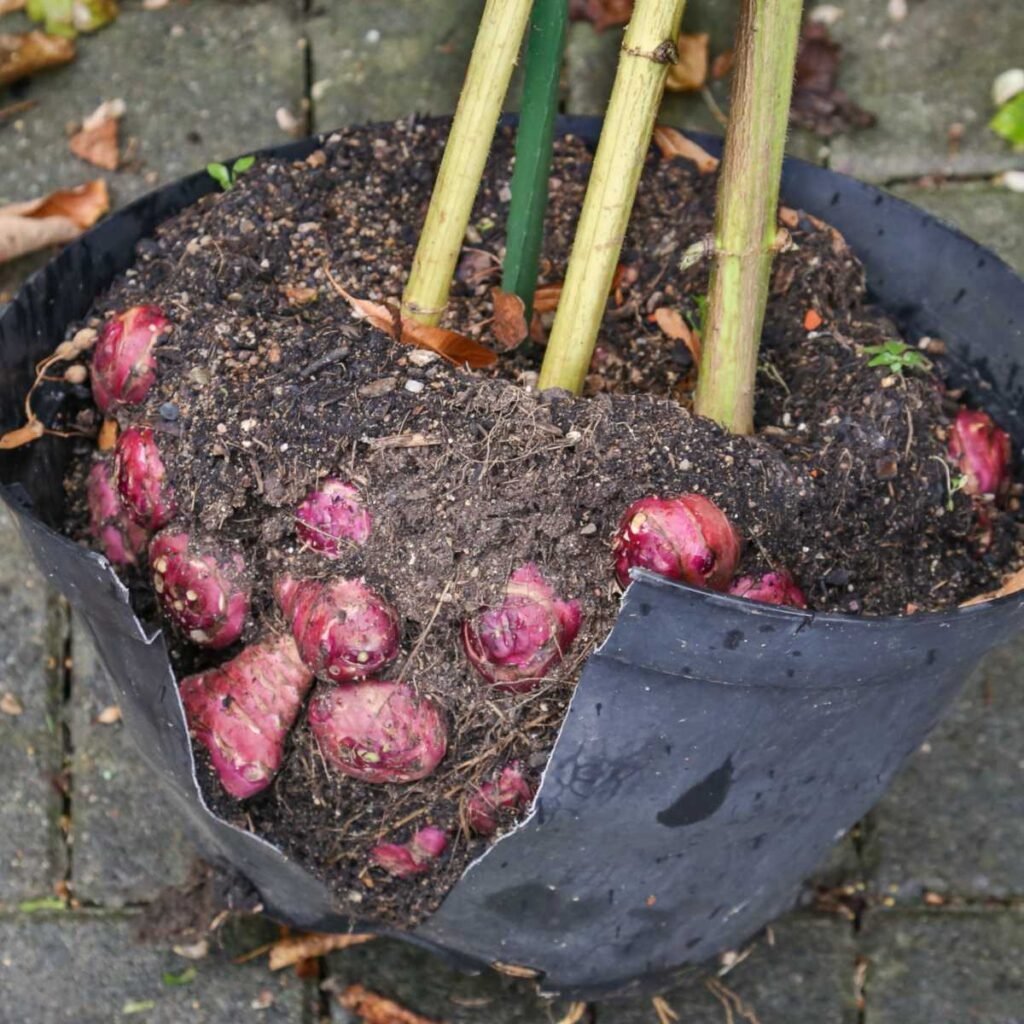
- Carefully dig through the container to find the tubers. You can also dump the entire pot onto a tarp and sift through the soil with your hands.
The tubers are irregularly shaped, crisp, and white inside. Wash them gently and enjoy them fresh or cooked.
Storage Tips
- Store harvested tubers in a cool, dark place such as a root cellar or the refrigerator.
- For longer storage, keep them in slightly damp sand or sawdust.
- You can also leave some tubers in the soil and harvest as needed throughout winter.
Replanting for Next Year
If you want to grow Jerusalem artichokes again, simply save a few healthy tubers from your harvest and replant them next spring. They’ll regrow easily and reward you with another abundant crop.
Troubleshooting Common Problems
1. Small or misshapen tubers:
Usually caused by overcrowding or poor drainage. Use fewer tubers per container and improve soil aeration.
2. Rotting tubers:
This happens when the soil stays too wet. Make sure drainage holes are clear and water less frequently.
3. Weak stems or poor growth:
Likely due to insufficient sunlight. Move your container to a sunnier location.
4. Overgrowth or top-heaviness:
Prune or trim the tops lightly, and provide stakes or supports as needed.
5. Flatulence from eating sunchokes:
This is due to their high inulin content. Start by eating small amounts until your digestive system adjusts.
Why Container-Grown Sunchokes Are Perfect for Small Gardens
Container growing isn’t just convenient — it’s ideal for modern, space-limited gardening. Even if you live in an apartment with only a balcony or terrace, you can still enjoy a fresh harvest of Jerusalem artichokes. The tall green plants also add a touch of beauty to your space, especially when they flower with their cheerful yellow blooms.
Additionally, by controlling the growing medium and moisture, you ensure that the tubers are cleaner, easier to harvest, and less prone to pests than those grown in open soil.
Final Thoughts
Planting Jerusalem artichokes in containers is simple, rewarding, and perfect for gardeners of all levels. With just a few healthy tubers, a large pot, and some sunlight, you can enjoy a plentiful harvest of sweet, nutty sunchokes right from your balcony or backyard.
To summarize:
- Choose large containers with good drainage.
- Use well-draining, compost-rich soil.
- Plant tubers 10–15 cm deep with eyes facing upward.
- Keep soil moist but never soggy.
- Harvest after frost when the foliage dies back.
Once you’ve grown your first batch, you’ll understand why Jerusalem artichokes are one of the most underrated — yet rewarding — container crops out there.